Tackling a DIY roller door installation can seem daunting. Manufacturer instructions are often technical, and the thought of making a costly mistake or handling high-tension springs is enough to make anyone hesitate. You have your new Australian Made door, and now you need a clear, safe plan to get it fitted correctly. This is where the guesswork ends. As a supply-only service, we believe in empowering our customers with the knowledge to get the job done right.
This comprehensive guide is your complete roadmap. We break down the entire process into clear, manageable steps-from checking your tools and preparing the opening to safely securing the door and tensioning the springs. By following this guide, you will not only save hundreds of dollars in professional installation fees but also gain the confidence and satisfaction of completing a major project yourself. Get ready to achieve a perfectly functional and secure roller door.
Before You Begin: Safety, Tools, and Preparation
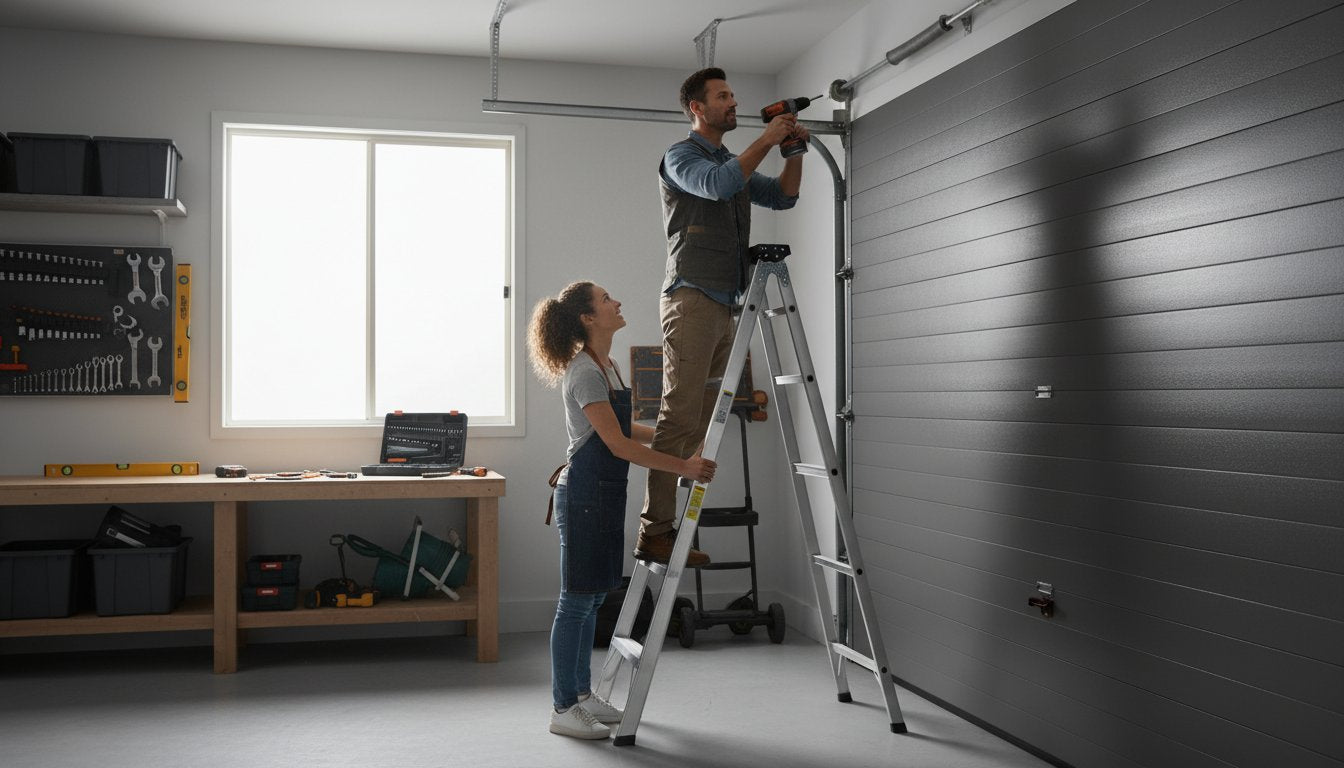
A successful diy roller door installation depends entirely on proper preparation. Before you even think about lifting the door, it’s critical to address safety, verify your tools and parts, and prepare the garage opening. This is a two-person job; attempting to lift and align a roller door alone is dangerous and impractical. The single most important first step is to read the specific manufacturer’s installation manual included with your door, as instructions can vary. Pay close attention to all warnings, especially regarding the pre-tensioned springs, which store significant energy and must be handled with extreme care.
Safety First: Critical Precautions
Your safety is the top priority. Do not cut corners or take risks. Adhere to these essential precautions throughout the entire installation process:
- Personal Protective Equipment (PPE): Always wear safety glasses, heavy-duty gloves, and sturdy, closed-toe footwear.
- Spring Safety: Never stand directly in the path of the door or in line with a spring while it is under tension.
- Ladder Stability: Ensure any ladders are placed on solid, level ground and are rated for the required weight. Have your partner hold the ladder steady when necessary.
- Clear the Area: Keep children, pets, and any unnecessary bystanders well away from the work zone until the installation is complete and tested.
Essential Tools and Parts Check
Working efficiently means having everything you need on hand. Unpack your new roller door and conduct a full inventory before you start.
- Required Tools: Gather your tools, including a power drill with bits, a socket set, a spirit level, two stable step ladders, and locking pliers or C-clamps.
- Component Check: Lay out all components and check them against the parts list in your manual. Ensure nothing is missing or damaged.
- Order Verification: Before proceeding, double-check that the door size, model, and colour are exactly what you ordered.
- Correct Fixings: Confirm you have the appropriate fasteners for your wall structure (e.g., masonry anchors for brick or concrete, coach screws for a timber frame).
Preparing the Garage Opening
The door will only operate smoothly if the opening is properly prepared. A few minutes of checks now will prevent major headaches later. Understanding the basic components of Roller shutter doors helps clarify why these clearances and surfaces are so important for correct function.
- Final Measurements: Re-measure the opening width and height to confirm they match your door's specifications.
- Check Clearances: Verify you have the required sideroom for the guide tracks and adequate headroom for the door roll. Refer to your manual for specific dimensions.
- Mounting Surfaces: Ensure the surfaces where the support brackets will be fixed are solid, structurally sound, completely flush, and level.
- Clean the Area: Remove all old door hardware, tracks, and brackets. Sweep the area clean of debris.
Step 1: Mounting the Support Brackets
This is the most critical phase of your diy roller door installation. The support brackets are the foundation for the entire system, and precision here is non-negotiable. Any inaccuracy in height or level will cause operational issues, uneven wear, and potential safety hazards down the line. This is especially true if you plan to install an automatic opener, as all components must work in perfect alignment to meet strict safety protocols, similar to the comprehensive Federal safety standards that govern operators in other markets. Take your time and measure meticulously.
Marking Out Bracket Positions
Correct positioning begins with accurate measurements. Refer to your specific door’s installation manual for the required axle height and side room clearances. Do not guess or estimate these figures.
- Measure up from the finished floor level to the required axle height and make a clear mark on the wall on both sides of the opening.
- Use a spirit level and a straight edge to draw a faint, perfectly horizontal line connecting these two marks across the opening.
- Position one bracket on the wall, aligning its axle hole with your horizontal line. Use the bracket itself as a template to mark the exact locations for the fixing holes.
- Crucial: Before drilling, double-check all your measurements. Measure the distance between the two brackets to ensure it matches the door width requirements. An extra minute with the tape measure now can save hours of frustration later.
Fixing Brackets to the Wall
With your positions marked, you can securely fix the brackets. The type of fixing you use depends entirely on your wall structure. Using the wrong fixings will compromise the entire installation.
- For Brick or Concrete: Use appropriate masonry anchors, such as M8 or M10 Dynabolts, ensuring they are long enough for a secure grip.
- For Timber Frames: You must locate the structural studs. Use heavy-duty M8 or M10 coach screws that penetrate deep into the timber.
Drill pilot holes to ensure accurate placement and prevent the main drill bit from wandering. Securely tighten all bolts, ensuring the brackets are completely rigid and sit perfectly flush against the wall with no gaps. Once tightened, place your spirit level across the top of both brackets one last time to confirm they remain perfectly level with each other.
Step 2: Lifting and Attaching the Roller Door
This is the most physically demanding part of any diy roller door installation. A standard single roller door can weigh over 40kg, making it heavy and awkward to handle. This step must not be attempted alone. A minimum of two capable people is required to lift the door safely and prevent injury or damage to the product. Proper preparation and clear communication with your helper are essential before proceeding with this critical lift.
Safely Lifting the Door Roll
Before you attempt the lift, walk through the process with your helper. Ensure your path from the ground to the brackets is completely clear of tools, packaging, and other trip hazards. Position a sturdy ladder for each person if required. Use correct lifting technique to avoid serious back strain.
- Plan your grip: Get a firm, balanced hold on the door roll before lifting.
- Lift with your legs: Keep your back straight, bend at the knees, and lift in a smooth, controlled motion.
- Move in unison: Both people should lift and move together. Communicate clearly throughout the lift.
- Position carefully: Hoist the door roll up and rest the axle ends securely into the U-shaped saddle of each wall bracket. Do not let go until it is stable.
Securing the Axle
With the door roll resting on the brackets, the next step is to fix it in place. Correct positioning is critical for smooth, balanced operation and to prevent the curtain from scraping on the tracks. First, centre the door roll between the brackets. Measure the overhang of the curtain on each side to ensure it is perfectly even.
Once centred, secure the axle with the provided U-bolts and nuts. Place one U-bolt over the axle and through the corresponding holes in the bracket saddle on each side. For precise alignment and technical specifications, consulting the DASMA Technical Data Sheets can provide industry-standard guidance. Hand-tighten the nuts first to hold the axle in place without full commitment.
Before the final tightening, perform a crucial check: ensure the door curtain is oriented to roll down from the front of the roll (the side facing out of the garage). If it's backward, you will need to lift it and turn it around. Once confirmed, use a wrench or socket set to tighten the nuts firmly. Do not over-tighten, as this can damage the bracket or axle.
Step 3: Fitting the Guides and Tensioning the Spring
This is the most critical phase of your diy roller door installation. Proper guide fitting and correct spring tensioning are essential for safe, smooth, and reliable operation. Pay close attention to the instructions provided by the manufacturer, as this stage involves stored energy and requires precision.
Installing the Vertical Guides
The vertical guides, or tracks, ensure the door curtain travels correctly along the opening. For a smooth and jam-free operation, they must be perfectly plumb.
- With the door roll mounted, carefully slide the vertical guides over the edges of the door curtain on both sides.
- Position the guides against the wall. Use a spirit level to ensure they are perfectly vertical (plumb). This is non-negotiable for correct door function.
- Fix the guides to the wall using the supplied fasteners (e.g., masonry anchors or bolts), but leave the bolts slightly loose to allow for minor adjustments.
- Manually check that the door curtain can move a short distance up and down within the guides without binding.
CRITICAL: Applying Initial Spring Tension
SAFETY WARNING: The roller door spring stores a large amount of energy. Incorrect handling can cause the door to drop or spin uncontrollably, leading to serious injury. Proceed with extreme caution.
This step must be completed before the door curtain is fully rolled down into the guides. The initial tension helps to counterbalance the weight of the door, making it manageable.
- With the door still mostly in its rolled-up position, you need to apply pre-tension. Rotate the entire door roll forward (in the direction it turns when the door is closing).
- The manufacturer's manual will specify the exact amount of rotation required-typically 1.5 full turns. Always refer to your specific product manual for this figure.
- Once tensioned, immediately and securely lock the axle in place. Use a pair of strong locking grips or a G-clamp, bracing it firmly against the mounting bracket to prevent it from unwinding.
Lowering the Door and Setting Stops
With the initial tension set and the axle safely locked, you can now feed the door into its final position.
- Carefully remove the clamp while maintaining a firm hold on the door curtain.
- Slowly and evenly guide the door down, ensuring the edges feed correctly into the vertical tracks on both sides.
- Lower the door until it is fully closed.
- Install the bottom stops onto the guides at the specified height. This prevents the door from over-travelling upwards when opened.
- Now that the door is in place and aligned, go back and fully tighten all the bolts holding the vertical guides to the wall.
Your door is now installed in its tracks and ready for final adjustments. For specific parts or if you have questions about your particular model, check the documentation that came with your order from doorsupply.com.au.
Step 4: Final Adjustments and Finishing Touches
The final checks are a critical part of any successful diy roller door installation. This stage ensures your new door is correctly balanced for safe, smooth operation and is properly secured. Do not skip these steps; they guarantee the long-term performance and durability of your door.
Testing and Adjusting Door Balance
A correctly balanced door should feel almost weightless and hold its position when partially opened. This prevents unnecessary strain on the components and any future motor you might install. An unbalanced door is a safety hazard and will perform poorly.
- Perform the Balance Test: Lift the door to the halfway point and carefully let go.
- Assess the Result: If the door drops, the spring tension is too low. If it rises on its own, the tension is too high. A perfectly balanced door will remain stationary or move only slightly.
- Adjust Tension: To add tension, rotate the axle in the direction that tightens the spring, as per your manufacturer's instructions. To reduce tension, rotate it in the opposite direction. Warning: Springs are under extreme tension. Make only small, incremental adjustments and follow all safety guidelines precisely.
- Lubricate: Once balanced, apply a quality silicone spray to the inside of the guide tracks for smooth, quiet travel. Do not use grease, as it will attract dirt and grit.
Fitting the Weather Seal and Lock
With the door operating smoothly, the final components can be fitted. The bottom weather seal is essential for protecting your garage from dust, pests, and water ingress.
Slide the provided rubber weather seal into the channel on the aluminium bottom rail. It should be a firm fit. Once fully inserted, use a sharp utility knife to trim any excess seal flush with the edges of the door for a clean, professional finish. Next, drill out the pre-cut holes for the centre lock mechanism. Secure the lock and any handles with the supplied fasteners and test the key to ensure the locking bars engage correctly with the tracks.
Your diy roller door installation is complete. You have successfully added value and security to your property. Now, consider the ultimate convenience upgrade for your new door.
Your door is installed! Time to consider an upgrade? Shop for roller door motors.
Your Successful DIY Roller Door Installation
You are now equipped with the knowledge to tackle your own roller door project with confidence. As this guide has shown, a successful diy roller door installation hinges on three key areas: thorough preparation and safety checks, precise installation of core components like support brackets, and careful final adjustments to the spring tension and guides. Getting these steps right ensures your new door will operate smoothly, securely, and safely for years to come, adding genuine value to your home or shed.
At Door Supply, our entire business is built to support the capable DIYer. Our supply-only model gives you direct access to high-quality, durable, and Australian-made roller doors without the added cost of installation services. We make the process straightforward with detailed measuring guides available online to guarantee a perfect fit. Once you place your order, we arrange for delivery Australia-wide, right to your door, so you can get started on your schedule.
Ready for your project? Browse our Australian-made DIY roller doors.
Frequently Asked Questions
How long does a DIY roller door installation take?
For a standard domestic roller door, a competent DIYer should allocate approximately 2 to 4 hours for the installation. This timeframe assumes you have a second person to help and all the necessary tools are ready. Factors like the door size, your experience level, and the condition of the opening can affect the total time. Always read the manufacturer’s instructions completely before you begin to familiarise yourself with the process and avoid delays.
Can one person install a roller door by themselves?
No, this is not recommended. A roller door is heavy, bulky, and extremely difficult to lift and position onto the mounting brackets by yourself. Attempting a solo installation poses a significant safety risk and increases the chance of damaging the door, your vehicle, or the property. For a safe and successful installation, this is a two-person job. One person can steady the door while the other secures the fixings.
What is the most common mistake people make during installation?
The most frequent error is failing to ensure the door is perfectly level and the tracks are plumb. If the axle and drum assembly is not perfectly horizontal, the door curtain will not roll up straight, causing it to scrape, bind, or bunch up on one side. This leads to noisy operation and premature wear. Always use a spirit level to check the brackets and axle multiple times before finalising their position.
How do I know if my wall is strong enough for the brackets?
Roller door brackets must be attached to a solid structural frame. For timber-framed garages, you must locate the wooden studs and fix directly to them. For brick or concrete block walls, use appropriate masonry anchors like Dynabolts. Never attach brackets directly to plasterboard or thin metal sheeting, as these materials cannot support the door's weight and operational forces. If unsure, consult a building professional before proceeding.
Is it significantly cheaper to install a roller door yourself?
Yes, undertaking a diy roller door installation can result in substantial savings. Professional installation typically costs between A$400 and A$600+, depending on your location and the complexity of the job. By completing the work yourself, you eliminate this labour cost entirely. The main trade-off is your time and the need to have the right tools and a capable helper. For those comfortable with hands-on projects, the savings are significant.
What should I do if the door is crooked or doesn't run smoothly in the tracks?
First, ensure the power is off if an opener is fitted. Check that the door drum is perfectly level with a spirit level; an unlevel drum is the most common cause of poor operation. Next, verify the vertical tracks are plumb (perfectly vertical) and parallel to each other. Loosen the track brackets slightly, make minor adjustments to their position, and then re-tighten. Also, inspect the tracks for any dirt, debris, or obstructions that could be causing the issue.