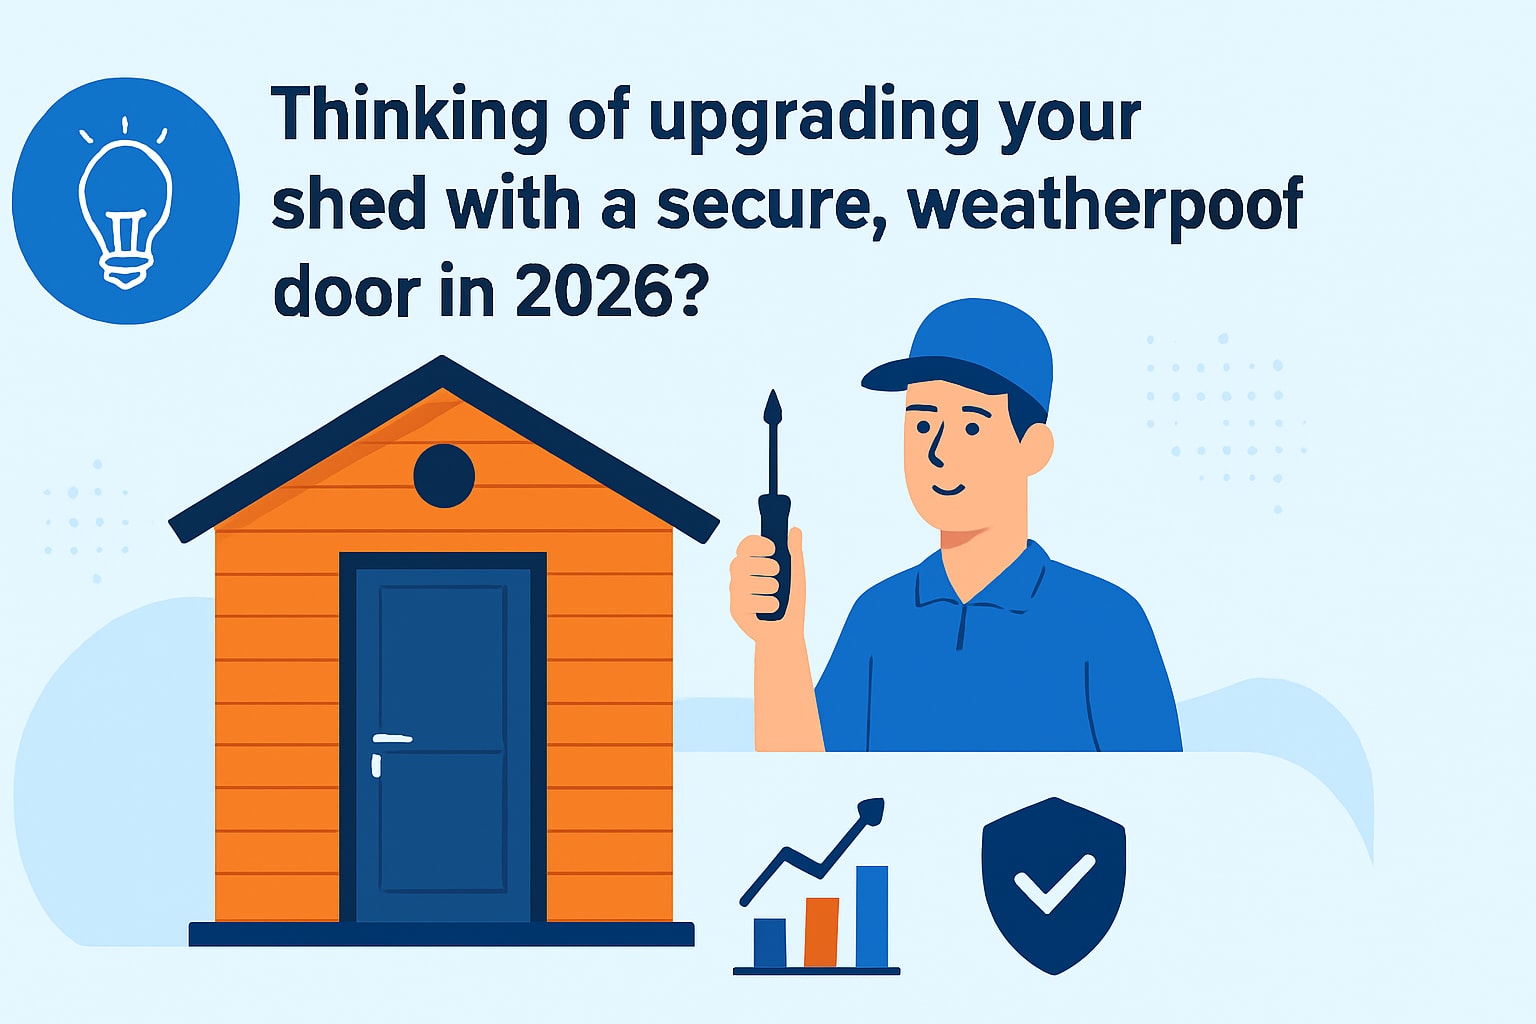
Thinking of upgrading your shed with a secure, weatherproof door in 2026? This expert guide takes you through every step of installing a door on shed, ensuring you achieve professional results with ease. Whether you are a DIY enthusiast or a seasoned tradesperson, you will find guidance on selecting the right door, preparing your tools, installation, and finishing touches. Discover the latest 2026 standards, security enhancements, and weatherproofing tips. Secure your shed, improve usability, and add value to your property. Ready to get started? Follow this guide for a flawless shed door installation.
Choosing the Right Shed Door for Your Needs
Selecting the ideal door on shed projects is the first step to a secure, functional, and long-lasting result. The right choice means factoring in your shed’s size, usage, climate, and security needs.
Types of Shed Doors: Pros and Cons
When choosing a door on shed structures, you’ll find three main types: hinged, sliding, and roller doors. Each offers unique benefits depending on your shed’s size and purpose.
| Door Type | Best For | Pros | Cons |
|---|---|---|---|
| Hinged | Small sheds | Simple install, good security | Needs swing space |
| Sliding | Medium/large sheds | Saves space, wide access | Needs a clear wall for tracks |
| Roller | Large/work sheds | Great for vehicles, compact | Higher cost, complex mechanism |
Material plays a crucial role in the durability of any door on shed projects. Timber brings a classic look but needs regular maintenance. Colorbond steel and galvanised steel are highly popular for their weather resistance and security, especially in harsh Australian climates. Aluminium and composite doors offer lightweight, rust-proof solutions, though they may vary in strength.
For sheds in cyclone-prone areas, always check for doors certified to AS/NZS 1170.2:2011 Region D. Powdercoated steel doors with reinforced frames are a leading choice for extreme conditions.
Door orientation matters too. Decide between left or right hinges, and consider inwards or outwards swing based on your space. If you’re retrofitting a personal access door, explore options like Personal access doors for sheds for a straightforward upgrade.
Sizing and Customisation Considerations
Choosing the right size for your door on shed installations ensures easy access and long-term usability. Standard door sizes include 820x2040mm and 920x2040mm, but always measure your opening precisely and account for the frame and clearances.
Customisation is key for non-standard openings or unique needs. Consider these options:
- Viewing panels for natural light
- Air relief grilles to improve ventilation
- Colour matching with the full Colorbond range
Accessibility is important, especially if your shed will be used as a workspace or for storing large equipment. Check local regulations to ensure your door on shed meets requirements for width, step height, and security.
For sheds with unusual dimensions, a custom door solution can make all the difference. For example, if your shed opening is wider than standard, a made-to-measure steel door can provide a perfect fit without compromising on strength or weather resistance.
Always factor in future needs, such as adding smart locks or increasing security, when planning your door on shed installation.
Tools, Materials, and Pre-Installation Preparation
Installing a door on shed is a rewarding project, but success starts with thorough preparation. Before you begin, gather the right tools and materials, and prepare your site for a smooth, safe installation. This step is crucial for both DIYers and professionals aiming for a secure, weatherproof result.
Essential Tools and Materials Checklist
To install a door on shed efficiently, assemble all required tools before starting. This not only saves time but ensures every stage is completed to standard.
Recommended Tools:
- Cordless drill and bits
- Angle grinder or circular saw (for cutting metal or timber)
- Measuring tape and spirit level
- Pop rivet gun and rivets (for metal sheds)
- Screwdrivers and impact driver
- Safety glasses, gloves, and ear protection
Materials Needed:
- Pre-hung door set or DIY door kit
- Hinges (heavy-duty, stainless steel for durability)
- Handles and locks (consider corrosion-resistant options)
- Weather seals and draught excluders
- Fixings: screws, bolts, plugs, or rivets
- High-quality sealant for Australian weather
Pre-Assembled Kits vs. DIY Builds:
| Feature | Pre-Assembled Kit | DIY Build |
|---|---|---|
| Time | Fast, less assembly | Longer, more steps |
| Skill Level | Beginner-friendly | Intermediate/advanced |
| Customisation | Limited options | Fully customisable |
| Example Brands | Fortress Gates, Dormakaba | Custom timber or steel |
Pre-assembled kits make installing a door on shed much simpler for most users, while DIY builds offer flexibility for unique openings or finishes.
Always select hardware compatible with your door on shed, and invest in quality products for longevity. Safety gear is non-negotiable—wear it throughout the project.
Site Preparation and Safety
Proper site preparation is vital for a stable, long-lasting door on shed. Start by inspecting your shed’s structure to confirm the frame is solid, level, and free from rot or rust. Reinforce weak areas as needed.
Clear your workspace inside and out. Remove tools, debris, and any stored items near the installation area. Carefully mark the intended door opening using a tape measure and level, double-checking all dimensions for accuracy.
Before any cutting or drilling, check for electrical wiring, plumbing, or insulation within the shed walls. Take extra care with metal sheds—use clamps and supports to prevent movement while working.
Weather plays a role in a successful installation. Choose a dry, mild day to fit your door on shed, as moisture can affect timber and adhesives, and wind may make handling large panels unsafe.
Sheds built on timber or concrete bases may require different fixings and preparation. Timber bases often need treated screws, while concrete may need masonry anchors.
If you want a visual walkthrough of the steps, watch this helpful Shed Door Installation Video Guide for practical tips on measuring, cutting, and frame installation.
Taking time to prepare your site ensures your door on shed fits perfectly, operates smoothly, and stands up to Australian conditions.
Step-by-Step Guide: Installing a Door on Your Shed
Installing a door on shed is a manageable project with the right planning and attention to detail. Whether you are retrofitting an old shed or starting from scratch, this guide will walk you through each vital step. Follow along to ensure your shed is secure, weatherproof, and compliant with the latest Australian standards in 2026.
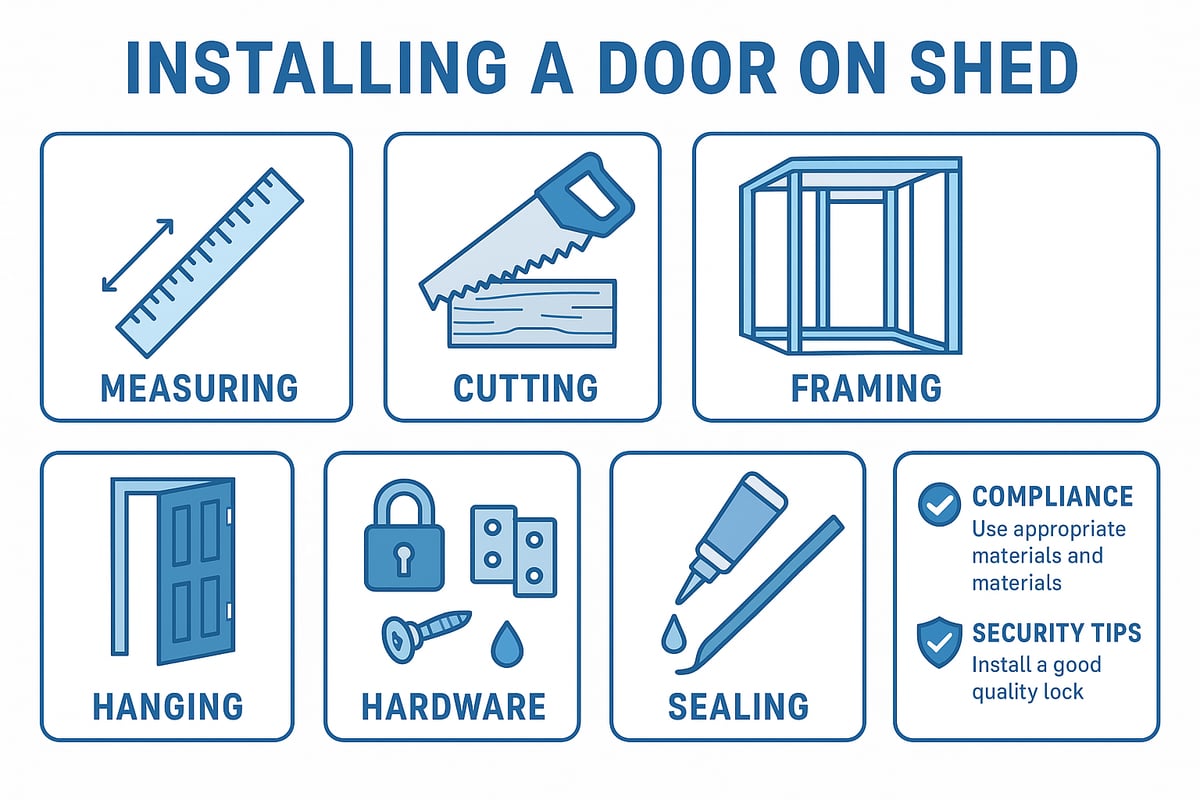
Step 1: Measuring and Marking the Door Opening
Start by measuring your shed’s existing opening or the area where you plan to install the new door on shed. Accurate measurements are critical for a seamless fit and smooth operation. Use a tape measure to record the width and height of the opening, taking note of any irregularities.
Allow for the door frame and necessary clearances. For example, leave at least 3mm clearance on each side and the top for easy movement. When marking out your opening, use a spirit level to ensure all lines are straight and square.
For metal sheds, mark with a permanent marker. For timber sheds, a pencil is ideal. Double-check measurements before moving to the next step. Ensuring accuracy here will prevent issues later in your door on shed installation.
Step 2: Cutting the Opening (If Retrofitting)
If you are installing a door on shed where no opening exists, cutting is required. For metal sheds, use an angle grinder with a metal-cutting disc. For timber or composite sheds, a circular saw or reciprocating saw is suitable.
Safety is crucial. Wear gloves, eye protection, and a dust mask. Secure the shed wall before cutting to avoid unwanted movement. Cut slowly, following your marked lines, to maintain structural integrity.
When working with corrugated iron, cut along the flat sections where possible. After cutting, reinforce any exposed edges with steel angle or timber battens. This step ensures your new door on shed will sit securely and withstand daily use.
Step 3: Installing the Door Frame
Position the door frame into your prepared opening. Ensure the frame is level and plumb using a spirit level. Check all four sides for square alignment before fixing.
There are several fixing methods, depending on your shed type:
- Face-fix: Screwing the frame directly onto the shed’s face.
- Reveal-fix: Setting the frame into the wall thickness.
- Welding: For metal sheds with steel frames, welding offers extra strength.
Use galvanised screws or bolts for timber sheds, and tek screws or rivets for steel sheds. For sheds in cyclone-prone regions, select frames and fixings that comply with wind ratings. For more on compliance, see Wind Rating Requirements for Shed Doors.
Check that the frame is secure and does not flex. This foundation is essential for the long-term performance of your door on shed.
Step 4: Hanging the Door
With the frame in place, it is time to hang the door on shed. If you have a pre-hung door set, installation is straightforward—simply slot the hinges into the pre-drilled holes and secure them.
For separate doors and hinges, position the door inside the frame with 3mm clearance all around. Mark hinge locations and pre-drill pilot holes. Use stainless steel ball-bearing hinges for durability, especially in coastal areas.
Fix the hinges to the frame and door, then check the swing direction. The door should open and close smoothly without binding. Adjust the hinges if needed. This step ensures your door on shed is functional and long-lasting.
Step 5: Fitting Handles, Locks, and Accessories
Now, install the handles and locks. Choose corrosion-resistant hardware such as stainless steel or powder-coated options, which are ideal for Australian conditions. Decide between lever handles, knobs, or push bars based on your shed’s use.
Install a flush lock for added security, especially if your shed stores valuable items. If you have chosen custom features like viewing panels or air relief grilles, fit them at this stage.
Use the manufacturer’s instructions for precise hardware placement. Double-check that all accessories operate correctly. Secure hardware is a key part of a reliable door on shed.
Step 6: Sealing and Weatherproofing
Protect your shed from the elements by sealing around the frame and door on shed. Apply weather seals to the frame perimeter to prevent drafts and water ingress. Use high-quality, UV-resistant sealants suitable for Australian climates.
Install flashing above and along the sides of the door if your shed is exposed to heavy rain. For metal sheds, foam weather seals offer extra protection against wind-driven rain.
Choose a powder-coated finish for steel doors, which provides additional weather resistance and reduces maintenance needs. Proper sealing extends the life of your door on shed and keeps the interior dry.
Step 7: Final Checks and Adjustments
Finish your installation by testing the door on shed. Open and close it several times to ensure smooth operation. Check that all locks engage correctly and that the door aligns flush with the frame.
Adjust hinges, latches, or weather seals as needed. Clean up any debris from the installation area. Dispose of offcuts and packaging responsibly.
A final inspection ensures your door on shed is secure, weatherproof, and ready for years of use. Take a moment to appreciate your work—your shed is now safer, more accessible, and better protected.
Shed Door Hardware, Security, and Compliance in 2026
Choosing the right hardware and ensuring compliance are crucial steps when installing a door on shed. In 2026, Australian homeowners and tradespeople have more options than ever, from advanced locking systems to cyclone-rated solutions. Modern shed door hardware not only safeguards your valuables but also enhances usability and long-term value.
Latest Hardware Options and Innovations
When selecting hardware for a door on shed, it is essential to consider the latest advancements. In 2026, popular choices include lever handles, flush locks, and push bars, catering to both security and accessibility. Stainless steel and marine-grade hardware are now standard for resisting corrosion, particularly in coastal and high-moisture environments. Many shed owners are also opting for smart locks, allowing remote control and monitoring of access, which is ideal for sheds converted into home offices or storage spaces.
Below is a quick comparison of common hardware options for a door on shed:
| Hardware Type | Durability | Corrosion Resistance | Security Level |
|---|---|---|---|
| Stainless Steel | High | Excellent | High |
| Marine-Grade | Very High | Superior | Very High |
| Powdercoated | High | Good | Moderate-High |
Brands like Dormakaba lead the way with robust, easy-to-install solutions. Upgrading to the latest hardware ensures your door on shed remains functional and protected for years to come.
Security Considerations and Standards
Security is a top priority for any door on shed, especially with sheds often housing valuable equipment. Choose tamper-proof locks and ensure all fixings are secure. In cyclone-prone regions, opt for doors and hardware with wind-resistant certifications, such as AS/NZS 1170.2:2011 Region D, or products marked as WindStrong.
Compliance with Australian standards is vital for insurance and safety. For detailed guidance on meeting these requirements, consult the Australian Standards for Security Doors. This ensures your door on shed installation is both secure and compliant.
If your shed doubles as a workspace or studio, consider upgrading to high-security hardware and additional features like reinforced frames. This approach not only protects assets but also meets modern expectations for safety and resilience.
Door Supply: Your Shed Door Partner
Door Supply stands out as a trusted partner for anyone installing a door on shed in 2026. Their extensive range includes roller, sectional, and personal access doors, all available in custom sizes and finishes. Products are engineered for harsh Australian conditions, with cyclone-rated and windlocked options ensuring peace of mind.
Customers benefit from expert installation support, comprehensive DIY guides, and access to leading brands known for durability and performance. Door Supply’s online platform offers instant pricing, fast delivery, and a wide selection of hardware and accessories for any door on shed project.
Homeowners, builders, and tradespeople can rely on Door Supply for tailored solutions that meet both functional and compliance needs, ensuring every door on shed is installed to the highest standard.
Troubleshooting Common Shed Door Installation Issues
Installing a door on shed can sometimes reveal unexpected challenges. Even with careful planning, problems like misalignment, leaks, or stubborn hardware can occur. By understanding common issues and knowing how to address them, you can ensure your shed door delivers lasting performance and security.
Alignment, Operation, and Fit Problems
One of the most frequent issues when installing a door on shed is poor alignment or operation. If the door does not close smoothly or fails to latch, start by checking that the frame is square and plumb. Use a level to verify alignment, and adjust the hinges as needed for a better fit.
If your shed base is uneven or sloping, you may need to add shims or re-level the frame. Sometimes, simply tightening screws or repositioning the strike plate resolves latching problems. Always ensure there is adequate clearance for the door swing, especially with larger roller or hinged doors.
Weatherproofing and Leak Issues
A common concern for any door on shed is preventing water ingress. Gaps around the frame or poor flashing can lead to leaks, especially during heavy rain. Inspect all seals and look for visible gaps or cracks along the perimeter.
Applying weather seals or foam strips can significantly reduce draughts and moisture. For metal sheds, foam seals are particularly effective at filling irregular gaps. Upgrade flashing and use high-quality exterior sealant to protect the interior. Addressing these issues early helps maintain a dry, usable shed space.
Hardware and Security Faults
Over time, hardware issues can affect the door on shed, leading to loose handles, faulty locks, or misaligned latches. Regularly check that all screws, bolts, and fixings are tight and secure. If a lock is difficult to operate or feels flimsy, consider upgrading to a tamper-proof or marine-grade option.
For sheds storing valuable items or acting as home offices, enhanced security is vital. Install quality locks and handles designed for outdoor use, and ensure all hardware is resistant to corrosion. Periodic maintenance will keep your shed door safe and functioning correctly.
Material-Specific Challenges
Different materials can present unique problems for a door on shed. Timber doors may warp or swell with humidity, while metal doors can rust if protective coatings fail. Composite materials may expand or contract with temperature changes.
To prolong the life of your shed door, follow a regular maintenance routine. Clean surfaces, lubricate hinges, and inspect for early signs of wear. For more detailed advice on caring for your shed door and hardware, consult this Shed door maintenance guide for tips tailored to Australian conditions.
Maintenance and Longevity: Keeping Your Shed Door in Top Shape
Maintaining your door on shed is essential for long-term performance, security, and value. Regular care not only extends the lifespan of your investment but also helps prevent unexpected issues. With the right maintenance routine, you can keep your door on shed operating smoothly and looking its best for years to come.
Regular Inspection and Care
Set a routine to inspect every door on shed at least twice a year. Check for loose hinges, worn seals, and any signs of rust or corrosion. Pay special attention to the locking mechanism and handles as these are high-use areas.
For different materials, use suitable cleaning methods. Colorbond and powdercoated steel doors benefit from a gentle wash with mild detergent, while timber doors may need light sanding and resealing. Lubricate hinges and moving parts with a silicone spray to prevent squeaks and ensure smooth operation.
For a more detailed checklist, refer to these Shed Door Maintenance Tips to keep your door on shed in top condition.
Preventing and Addressing Wear
Early detection of wear is key to avoiding costly repairs. Look for paint flaking, surface rust, or swelling in timber panels. For metal doors, inspect for any bubbling in the finish, which may signal corrosion beneath.
Repaint or touch up any affected areas as soon as possible. Colorbond doors can be maintained with matching touch-up paint, while timber may require resealing or a fresh stain. Replace worn weather seals promptly to keep your door on shed weatherproof and energy efficient.
- Signs of wear to watch for:
- Rust spots on steel surfaces
- Warping or splitting in timber
- Cracked or brittle seals
Addressing these issues early keeps your door on shed secure and functional.
Upgrading and Retrofitting
There may come a time when your door on shed needs an upgrade. If you have converted your shed into a home office or hobby space, consider retrofitting with higher-security locks or smart access systems. Modern hardware options offer improved corrosion resistance and can be installed with minimal fuss.
When weather conditions are severe, upgrading to a windlocked or cyclone-rated door is a smart move, especially in exposed or coastal areas. Newer weather seals and insulation kits can further enhance the comfort and security of your door on shed.
Seasonal and Environmental Considerations
Australian weather can be tough on any door on shed. Before storm season, inspect seals and flashing for gaps. In bushfire-prone regions, check that your door on shed meets local fire safety standards and consider installing a fire-rated panel if required.
During heatwaves, ensure that the finish on metal or Colorbond doors remains intact to prevent fading or warping. For sheds near the coast, regularly rinse off salt deposits to prevent corrosion.
Preparing your door on shed for all seasons will safeguard your investment and ensure reliable access, no matter the conditions.
Frequently Asked Questions About Shed Door Installation
Thinking about installing a new door on shed but still have a few questions? Below, we answer the most common queries from homeowners, renovators, and tradies looking to upgrade their shed access in 2026.
What’s the average cost of installing a door on shed in Australia in 2026?
The average cost to install a door on shed can range from $450 to $1,300, depending on the type of door, materials, and whether you hire a professional or do it yourself. Roller and steel doors tend to be at the higher end, while basic timber or aluminium doors are more affordable. Always factor in hardware, locks, and weatherproofing for a complete budget.
Can I install a door on shed myself or should I hire a professional?
If you have basic carpentry or metalworking skills, installing a door on shed is a manageable DIY project with the right tools. Pre-hung door kits make the process easier. However, for large or cyclone-rated doors, or if your shed requires structural adjustments, hiring a licensed installer ensures compliance and a flawless fit.
Which shed door material is best for coastal or bushfire-prone areas?
For harsh coastal climates, opt for Colorbond or galvanised steel with a powdercoat finish to resist rust and corrosion. In bushfire zones, look for metal doors rated for fire resistance and fitted with ember seals. Windlocked doors for harsh climates offer extra security and weather protection if your door on shed faces strong winds or storms.
How do I ensure my door on shed meets local council regulations?
Check your local council’s building codes before starting your project. Requirements typically include minimum door sizes, clearance for accessibility, and cyclone or wind ratings in some regions. For new builds, you may need to submit plans for approval. Always use certified products and follow manufacturer guidelines to ensure compliance.
What are the top security features to look for in a shed door?
A secure door on shed should have a robust frame, tamper-proof locks, and durable hinges. Consider stainless steel or marine-grade hardware for added protection. For high-value storage or home office sheds, look for doors with reinforced panels, multi-point locking, and security certifications.
How can I retrofit an existing shed with a new door on shed?
Retrofitting involves measuring the existing opening, cutting or enlarging it as needed, and fixing a new frame securely in place. Choose a door that matches your shed’s structure and base, and use weather seals to prevent leaks. Always check for wiring or pipes before cutting.
Where can I buy high-quality shed doors and accessories online?
Australian buyers can find a wide selection of shed doors, including roller, hinged, and new personal access door options from reputable suppliers. Look for stores offering cyclone-rated, custom-sized, and Colorbond-finished doors with expert support and fast delivery to your region.
Now that you know exactly how to choose and install the perfect shed door, you’re well on your way to creating a secure, weatherproof, and user friendly space for years to come. If you’re looking for a door that stands up to Australia’s toughest conditions—especially in cyclone or high wind regions—consider upgrading to a windlocked option for added peace of mind. With the right choice, you can protect your investment and ensure smooth operation in any weather. Ready to take the next step? Explore your options and Buy a Windlocked Roller Door for long lasting durability and security.