
Thinking of upgrading your garage with the latest in convenience and security? In 2025, having garage door openers installed is one of the easiest ways to modernise your home and boost everyday comfort. This guide offers a clear, step-by-step approach for getting garage door openers installed, whether you are a DIY enthusiast or a homeowner seeking a professional finish. We will walk you through selecting the right opener, preparing for installation, the complete fitting process, troubleshooting, and essential maintenance. Discover how simple it can be to enjoy reliability, safety, and smart features in your garage.
Understanding Garage Door Openers in 2025
Choosing the right garage door openers installed for your home in 2025 means understanding the latest technologies and options available. The market now offers a broad range of models, each tailored to suit specific garage styles, budgets, and user preferences. Let’s break down the key aspects you need to consider when planning to have garage door openers installed.
Types of Garage Door Openers
When looking to have garage door openers installed, you’ll encounter several drive types: chain, belt, screw, and direct drive. Each has distinct strengths. Chain drives are robust and affordable, but can be noisy, making them better for detached garages. Belt drives are quieter and ideal for garages attached to living spaces, though they come at a slightly higher cost. Screw drives offer a good balance of speed and durability, with moderate noise levels. Direct drive models are smooth and virtually silent, appealing to those seeking the quietest solution.
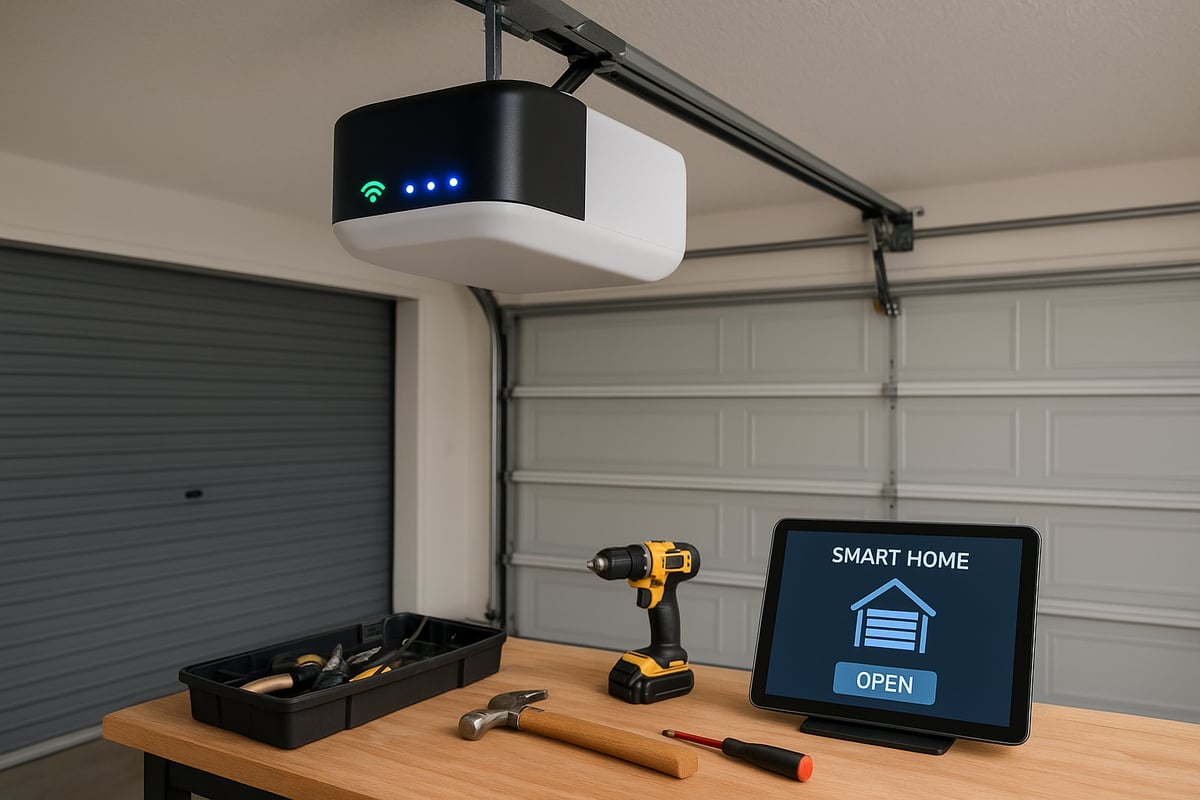
Modern smart openers often include Wi-Fi and app integration, giving you remote control and monitoring. Battery backup and solar-powered options are now common, ensuring garage door openers installed remain operational during power outages. Noise level and suitability depend on your garage type, so assess your needs carefully. Brands like Merlin and ATA offer openers with advanced smart features.
Technological Advancements
The evolution of garage door openers installed has been rapid, especially with integration into smart home ecosystems. Today’s models connect seamlessly with Google Home or Alexa, allowing voice commands and automation. Safety has also improved, with features such as auto-reverse and motion detection now standard, reducing the risk of accidents.
Enhanced energy efficiency and eco-friendly design are increasingly prioritised by manufacturers. According to industry reports, 70% of new garage door openers installed in 2024 included smart connectivity, highlighting the growing demand for intelligent solutions. For a deeper dive into the latest innovations, see this overview of Smart Garage Door Openers in 2025.
Choosing the Right Opener for Your Garage
Selecting the right garage door openers installed starts with assessing your specific garage door. Consider the door’s size, weight, and how often it will be used. Heavier double sectional doors, for example, require openers with higher torque motors for reliable performance. Roller doors may need different mounting hardware than sectional or tilt doors.
Regional factors are also important. If you live in a high-wind area, look for wind-locked opener options to ensure safety and compliance. Matching the opener’s power and technology to your door type is crucial for a smooth and long-lasting operation. Consulting with a specialist can help you make the best choice for your requirements.
Cost Factors and Budgeting
Budgeting for garage door openers installed involves more than just the cost of the unit itself. In 2025, chain drive openers typically range from $350 to $550, while belt and direct drive models may reach $800 or more. Additional expenses include installation, accessories, and smart upgrades, which can add a few hundred dollars to your bill.
Weighing DIY installation against professional fitting is essential. While DIY can save an average of $250, it requires technical skill and time. Accessories like remote controls, smart modules, and backup batteries may increase upfront costs but often pay off in convenience and reliability. Always factor in both immediate and long-term value.
Safety and Compliance Standards
Ensuring your garage door openers installed meet Australian safety standards is non-negotiable. Look for compliance with marks and certifications, such as the AS/NZS 60335.2.95 standard. Child safety features, including auto-reverse and manual emergency release, are mandatory.
All devices must be installed with proper warning labels and emergency mechanisms. Inspect for safety sensors and ensure they are correctly positioned. Responsible installation not only protects your family but is also a legal requirement. For example, openers with full compliance can help prevent accidents and ensure peace of mind.
Preparing for Installation: Tools, Materials, and Safety
Getting garage door openers installed correctly starts long before you lift a single tool. Preparation is essential to ensure safety, efficiency, and lasting results. This section breaks down what you need, how to stay safe, and the steps to set your project up for success.

Tools and Materials Checklist
Before getting garage door openers installed, assemble all necessary tools and materials to avoid interruptions. Essential tools include a power drill, spanners, screwdrivers, a sturdy ladder, and safety glasses for eye protection. Materials should cover your opener kit, mounting brackets, wiring, and fasteners. Always check if your current garage door is compatible with the chosen opener model. Some kits include mounting rails, but wiring may need to be sourced separately. For detailed, step-by-step tool requirements, consult the Roller Door Opener Installation Guide for practical insights. Preparation at this stage leads to a smoother installation process.
Pre-Installation Safety Measures
Safety should be the top priority when you have garage door openers installed. Begin by disconnecting the power supply to prevent accidental activation. Secure the garage door in place with clamps or locking pliers to avoid unexpected movement. Always wear appropriate PPE, such as gloves and safety glasses. Clear your workspace of clutter, and ensure good lighting throughout the area. Studies show that 20% of DIY injuries occur due to inadequate safety precautions, so never skip these vital steps. Being thorough with safety measures gives you confidence and peace of mind during the installation.
Measuring and Assessing Your Garage Door
Accurate measurements are crucial for success when getting garage door openers installed. Use a tape measure to check the door’s width, height, and thickness. Identify the door type: roller, sectional, or tilt, as this determines opener compatibility. Look for obstructions, such as shelving or pipes, that may affect installation space. Sectional doors, for example, require a minimum headroom clearance—always check manufacturer guidelines. Recording these details ensures your new opener fits perfectly and operates smoothly. Attention to these steps prevents costly mistakes and delays.
Removing Old Opener (if applicable)
If you are replacing an existing system, careful removal is key to having garage door openers installed safely. Disconnect all power sources and detach wall controls and sensors. Remove mounting brackets and hardware in a logical order, keeping parts organised. Take photos before disassembly to guide reinstallation if needed. Recycle or dispose of the old unit responsibly, following local regulations. Inspect the garage door hardware for wear or damage before proceeding. Taking these steps ensures the new opener will work reliably and safely.
Step-by-Step Installation Guide for Garage Door Openers
Ready to get your garage door openers installed? This comprehensive guide will walk you through every step, ensuring a smooth, safe, and efficient installation process. Whether you are a seasoned DIYer or just starting out, following these steps will help you achieve professional results.
Step 1: Unboxing and Inspecting the Opener Kit
Start your journey to having garage door openers installed by carefully unboxing your chosen kit. Lay out all the components on a clean surface and cross-check them with the manufacturer’s inventory list. Missing or damaged parts can halt progress, so verify everything is present before you begin.
Read through the manual thoroughly, even if you have previous experience getting garage door openers installed. Many kits, such as those from Merlin, include illustrated quick-start guides that make assembly more intuitive. If you are considering a specific model, the ATA Easy Roller Door Opener is a popular choice for reliability and ease of use.
Take a moment to familiarise yourself with each part. This preparation will make the following steps straightforward and help you avoid common mistakes that can occur when getting garage door openers installed.
Step 2: Assembling the Opener Rail and Motor Unit
With all parts ready, begin assembling the rail and motor unit. Connect the rail sections as directed, ensuring each joint is secure to prevent issues later when you have garage door openers installed. Attach the drive mechanism, whether it is a chain, belt, or screw, depending on your model.
Secure the motor unit to the rail assembly, making sure it aligns perfectly with the rail’s straight path. Use a spirit level to double-check alignment, as uneven assembly can cause operational problems once your garage door openers installed project progresses.
Tighten all fasteners and brackets, but avoid overtightening, which may damage components. Taking extra care at this stage will ensure your garage door openers installed operate smoothly and quietly.
Step 3: Mounting the Opener to the Ceiling
Next, it is time to mount the assembled unit to your garage ceiling. Locate ceiling joists or other sturdy supports, as proper anchoring is critical for the longevity and safety of your garage door openers installed.
Fix the mounting bracket to the ceiling, using appropriate fasteners for your ceiling material. If your kit includes anti-vibration pads, such as those recommended for ATA models, install them now to reduce noise and prolong equipment life.
Once the bracket is secure, lift the opener assembly into place and fasten it carefully. Check for any movement or instability, as a solid mount is essential for reliable garage door openers installed. Finally, confirm that the unit is level and aligned with your garage door’s track.
Step 4: Attaching the Rail to the Garage Door
With the opener mounted, focus on connecting the rail to the garage door itself. Attach the door bracket firmly, then link the rail’s trolley carriage to the bracket. Adjust the carriage position to ensure it moves smoothly along the entire track, which is crucial for optimal garage door openers installed performance.
Inspect the door’s movement by gently opening and closing it manually. There should be no sticking or resistance. Lubricate all moving parts, such as hinges and rollers, to reduce friction and extend the life of your garage door openers installed.
If you encounter any obstructions or clearance issues, address them before proceeding. A properly aligned system at this stage will result in fewer issues once your garage door openers installed are operational.
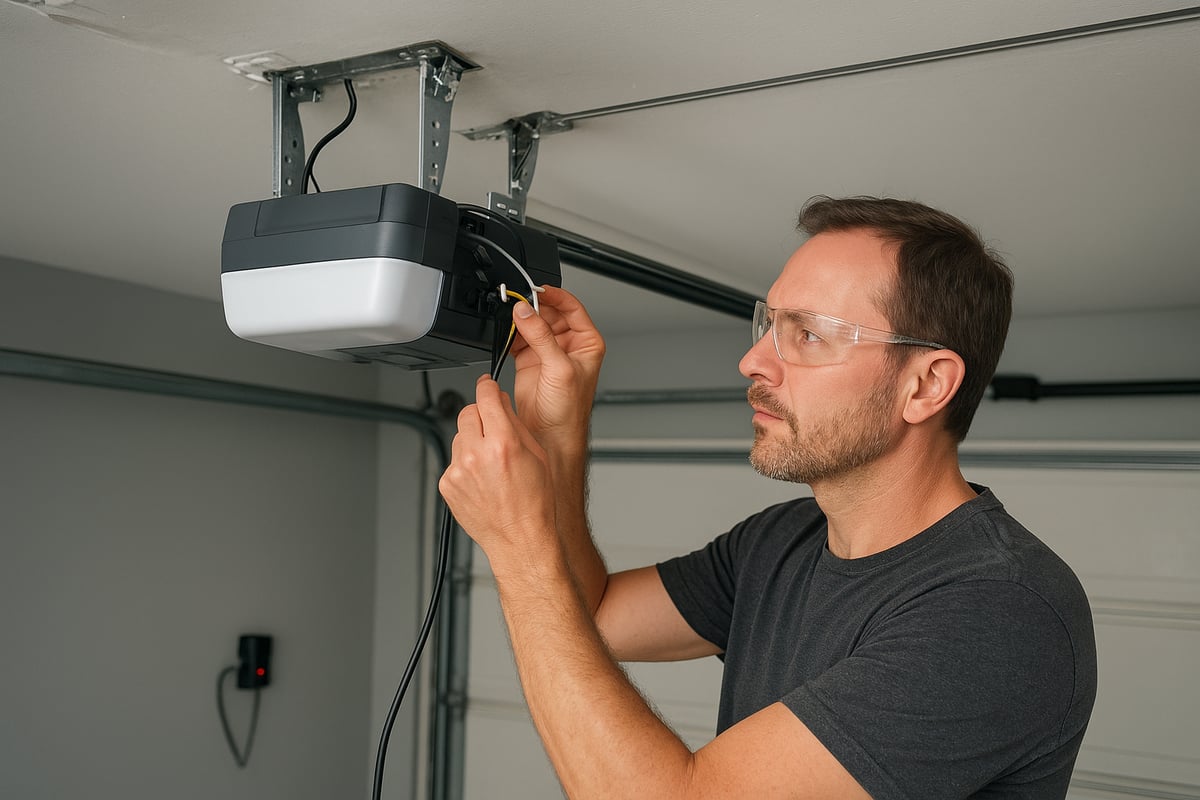
Step 5: Wiring and Electrical Connections
Now it is time to handle the wiring and electrical setup, a critical component in getting garage door openers installed safely and legally. Route all power cables along the ceiling and walls, securing them away from moving parts. Follow the manufacturer’s instructions and comply with Australian electrical standards to ensure safety.
Connect the wall-mounted controls, safety sensors, and backup battery if included. For smart models, this is the stage to set up Wi-Fi or app integration. Refer to the manual for pairing instructions, as smart garage door openers installed require network access for full functionality.
Double-check all connections, ensuring no exposed wires or loose fittings remain. If you are unsure about any step, consult a qualified electrician. Proper wiring is essential for reliable, long-term garage door openers installed.
Step 6: Programming and Testing the Opener
With hardware in place, begin programming your opener. Set the travel limits, which determine how far the door opens and closes. Adjust the force settings to match your door’s size and weight, a key step for safe garage door openers installed.
Pair the remote controls and connect any smart devices or apps. Test all safety features, especially the auto-reverse function and motion sensors. Run several open and close cycles to ensure consistent, smooth operation. If the system does not respond as expected, recheck programming steps, as most problems with garage door openers installed result from incorrect setup.
Keep the manual handy for troubleshooting. Taking time to get programming right will ensure your garage door openers installed are both safe and convenient.
Step 7: Final Checks and Safety Verification
As you near completion, carry out final inspections on your installation. Examine all fasteners, brackets, and electrical connections for tightness and security. Run the door through multiple open and close cycles, observing its movement and listening for unusual noises, which can signal issues with your garage door openers installed.
Test the manual release and emergency operation features. Make sure everyone in your household knows how to use these in case of power failure or other emergencies. Keep the installation manual in an accessible place for future reference, as it will be invaluable for maintaining your garage door openers installed.
A thorough final check ensures your system is safe, reliable, and compliant with all relevant standards.
DoorSupply: Your Trusted Source for Garage Door Openers
When you are ready to have your garage door openers installed, consider DoorSupply as your go-to provider. They offer a wide selection of Australian-made openers, compatible with both roller and sectional doors.
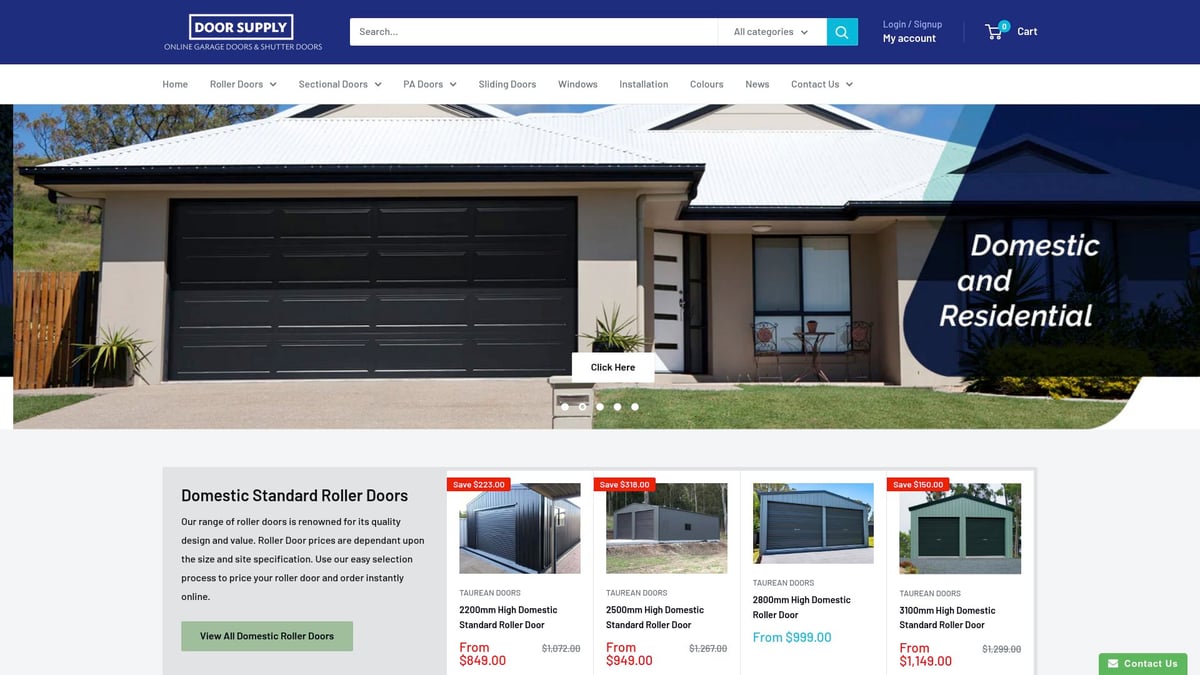
Customise your order online to fit your garage’s exact needs, and benefit from free delivery to most major Australian cities. Each product comes with a detailed PDF installation guide, making DIY installation straightforward for anyone wanting garage door openers installed.
DoorSupply’s dedicated customer support is available to answer installation queries. All units are manufactured in Melbourne using premium Bluescope steel, ensuring durability and long-lasting performance.
Troubleshooting Common Installation Issues
Every DIY project has its challenges, and getting garage door openers installed is no exception. Even with careful setup, you may encounter issues that prevent smooth operation. This section guides you through the most frequent problems, ensuring your opener runs reliably and safely.
Opener Won’t Operate or Respond
If your garage door openers installed are not responding, start by checking the power supply and ensuring all electrical connections are secure. Sometimes, the wall control or remote may be at fault, so test these with fresh batteries.
- Confirm the opener is plugged in and the circuit breaker is on.
- Reset the system by unplugging and reconnecting the unit.
- Review the manufacturer’s manual for specific reset instructions.
If issues persist, refer to this Garage Door Opener Installation Guide for detailed troubleshooting steps and wiring checks. Remember, a simple oversight like a dead remote battery is often the culprit. Keep all remotes programmed correctly to avoid operational hiccups.
Door Doesn’t Open or Close Fully
When garage door openers installed fail to fully open or close the door, it’s usually due to travel limit or force setting errors. Inspect the tracks and ensure there are no obstructions blocking the door’s path.
- Adjust travel limits according to the manual.
- Check for sensor misalignment or blocked paths.
- Lubricate tracks, rollers, and hinges to reduce resistance.
According to Garage Door Opener Installation Statistics, sensor misalignment accounts for 60% of incomplete closures. Take your time with the setup for smooth, reliable movement.
Noisy Operation or Vibration
Noisy garage door openers installed can be disruptive, especially in homes with living spaces above the garage. Identify the source by inspecting all mounting brackets and hardware for looseness.
- Tighten all bolts and fasteners.
- Use vibration dampening pads where possible.
- Consider switching to a belt drive model for quieter operation.
A well-installed opener should run smoothly and quietly. Regular maintenance, including lubrication, will further reduce unwanted noise and extend your system’s life.
Safety Sensor Problems
Safety sensors are vital when you have garage door openers installed, as they prevent accidents and ensure compliance with safety standards. If the opener refuses to close, inspect the sensors closely.
- Clean the lenses with a soft cloth.
- Confirm that both sensors are aligned and facing each other directly.
- Check all wiring for damage or disconnections.
Replace faulty sensors promptly and always test the auto-reverse function to guarantee safe operation. Proper sensor care is critical for a secure and functional garage door system.
Maintaining and Upgrading Your Garage Door Opener
Keeping your garage door openers installed in top condition ensures smooth operation, enhances security, and saves money in the long run. With a few simple habits and timely upgrades, you can extend the life of your system while enjoying the latest smart features.
Routine Maintenance Tips
For garage door openers installed in your home, routine checks are essential. Start with a monthly visual inspection for signs of wear on cables, springs, and brackets. Listen for unusual noises during operation, as these can indicate loose hardware or lack of lubrication.
Quick Maintenance Table:
| Task | Frequency | Notes |
|---|---|---|
| Inspect hardware | Monthly | Tighten loose parts |
| Lubricate parts | Every 3 months | Use silicone spray |
| Test safety features | Quarterly | Auto-reverse, sensors |
| Clean sensors | Monthly | Wipe lenses gently |
Regular maintenance can extend the lifespan of garage door openers installed by up to 40 percent. Always disconnect power before servicing and keep the area clear for safety.
Upgrading to Smart Features
Modernising your garage door openers installed with smart technology offers both convenience and enhanced security. Retrofitting existing systems is often straightforward, with Wi-Fi modules available for many brands. These upgrades allow for remote monitoring, scheduling, and receiving alerts directly to your mobile device.
- Benefits of smart upgrades:
- Open or close your garage remotely.
- Get notified if the door is left open.
- Integrate with home assistants like Alexa or Google Home.
If you have a sectional door, consider reviewing the Sectional Garage Doors Overview to ensure compatibility with the newest smart opener models. Upgrading garage door openers installed lets you stay connected and in control, even when you are away from home.
Season-Specific Maintenance
Australia's climate puts unique demands on garage door openers installed. As summer approaches, check weather seals to keep out dust and heat. In storm-prone areas, ensure your opener and door are wind-locked and inspect for signs of water ingress.
- Replace worn weather seals before winter.
- Inspect insulation and door balance after heavy storms.
- For cyclone-prone regions, upgrade to wind-locked sectional doors.
Staying proactive with season-specific care means your garage door openers installed will operate reliably, regardless of weather conditions. A little preparation helps avoid costly repairs and keeps your home secure.
When to Seek Professional Help
While many tasks for garage door openers installed can be handled by homeowners, certain issues require expert attention. Electrical faults, severe door imbalance, or persistent motor problems should be addressed by a licensed technician. Regular servicing every two to three years helps maintain safety and warranty compliance.
Recognising when help is needed is crucial, especially with compliance and safety standards. For a detailed overview of required standards and codes, see the Garage Door Opener Safety Standards. Trusting a professional ensures your garage door openers installed remain safe, efficient, and legally compliant.
Now that you’re equipped with all the essential steps for installing a garage door opener in 2025, why not take the next step towards upgrading your home’s convenience and security? With DoorSupply’s focus on Australian made products, custom sizing, and expert support, you have everything you need to make your DIY project a smooth success. Whether you’re looking for a roller door, sectional option, or simply want to explore compatible openers and accessories, you can browse and order with confidence, knowing you’ll get quality and guidance every step of the way.
DIY Garage Doors