Tired of looking at a dusty, stained, and cracked concrete slab? For many Australian homeowners, the garage floor is a neglected surface that collects dirt and makes the entire space feel unfinished. It doesn’t have to be that way. Selecting the right garage flooring is the most effective way to transform this area from a simple car park into a functional workshop, a home gym, or even a clean showroom for your pride and joy. A quality floor doesn’t just look better-it performs better, resisting damage and making maintenance simple.
This guide provides a direct, no-nonsense breakdown of the best garage flooring options in Australia. We compare the leading solutions-including tough epoxy coatings, interlocking DIY tiles, and heavy-duty sealers-on the factors that matter most: durability, installation difficulty, and overall cost. You will get clear, practical information to help you choose a surface that handles dropped tools, chemical spills, and daily vehicle traffic, ensuring you invest in a quality solution that adds real value and functionality to your home.
Why Upgrade Your Garage Floor? (Beyond Just Parking)
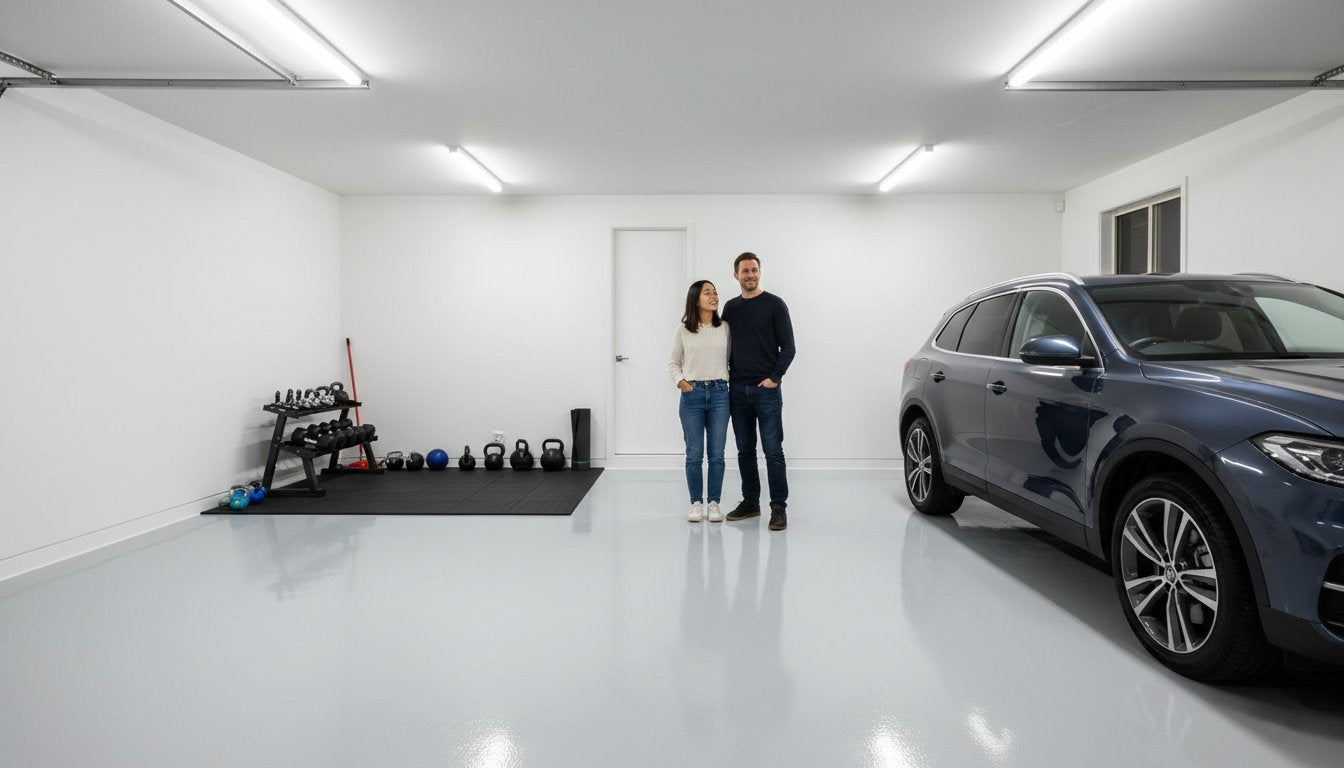
The standard Australian garage is no longer just a space for parking the car. It has evolved into a multi-purpose room: a workshop for DIY projects, a home gym, a clean storage area, or even an extension of your living space. However, a bare, dusty concrete slab can limit this potential. A quality floor is the foundation for transforming your garage into a truly functional and valuable part of your home.
Upgrading your garage flooring is a practical investment that delivers immediate benefits in safety, cleanliness, and aesthetics. For a visual overview of popular choices, see the video below.
Functionality: Creating a More Usable Space
A finished floor fundamentally changes how you can use your garage. The primary functional benefits include:
- Dust Reduction: Sealing or covering concrete significantly reduces the fine, grey dust that gets tracked into your home.
- Improved Comfort: A new surface provides a more comfortable and forgiving foundation for standing, working on projects, or exercising.
- Zoned Areas: Use different colours or finishes to clearly define specific zones for parking, a workshop, storage, or a fitness area.
For those creating a dedicated workshop or studio, the right furniture is just as critical as the flooring. A high-quality, ergonomic desk can transform the space into a productive environment. To see examples of premium workstations designed for creative professionals, you can visit StudioDesk.
A cleaner garage is especially beneficial for households with pets, creating a healthier environment by reducing the dust and dirt they can track through the house. This same attention to a pet's well-being is why many owners are now exploring higher-quality nutrition. As an example of this trend, you can visit DF Dog Food to learn about fresh, human-grade meal services.
Durability and Safety
Your garage floor is subject to heavy use, chemical spills, and moisture. A wide range of modern flooring materials are specifically engineered to protect the concrete slab and improve safety. A proper flooring solution will:
- Protect the Concrete: Creates a barrier against damage from oil stains, chemicals, road salts, and moisture ingress.
- Conceal Imperfections: Effectively covers existing cracks, pitting, and stains for a clean, uniform appearance.
- Increase Safety: Many options, such as epoxy with a flake additive, provide a slip-resistant texture, making the area safer in wet conditions.
Aesthetics and Property Value
A clean, finished garage floor is a significant visual upgrade that adds tangible value to your property. It demonstrates a high level of care and maintenance that is attractive to potential buyers. A finished floor makes the garage feel brighter, larger, and more integrated with the rest of your home, completing the look when paired with quality wall storage and a modern garage door.
How to Choose: 4 Key Factors for Your Garage Flooring Decision
Before exploring the different types of garage flooring, it is crucial to assess your specific needs, budget, and limitations. This practical framework helps you compare options directly and make a choice that provides long-term value for your space. Consider these four key factors to narrow down the best solution for your garage.
Budget: Upfront Cost vs. Long-Term Value
Your total project budget includes more than just the price per square metre. A higher initial investment in a durable solution is often more economical over time, saving you the cost and hassle of frequent repairs or replacements.
- Material Costs (per m²): Expect to pay around A$5-A$15 for DIY epoxy kits, A$40-A$80 for quality interlocking tiles, and A$80-A$150+ for professionally installed epoxy or polyaspartic systems.
- Additional Costs: Always factor in tools and preparation materials. This can include concrete grinder hire (approx. A$150-A$250/day), cleaning chemicals, patch fillers, and rollers.
- Long-Term Value: A cheap floor paint may look good initially but can peel from hot tyres within a year or two. A professional-grade coating, while more expensive upfront, can last over a decade.
DIY vs. Professional Installation
Be realistic about the time and skill required for the project. While DIY saves on labour, a poor installation can lead to premature failure and wasted material costs. For any coating or adhesive product, proper surface preparation is the most critical step and cannot be rushed.
- Easy DIY: Roll-out mats and most interlocking tiles require minimal prep and no special tools.
- Advanced DIY: DIY epoxy kits are achievable for a careful and patient person. Success depends entirely on meticulous prep work.
- Professional Recommended: Polished concrete and commercial-grade coatings. A pro offers a warranty, uses superior materials, and completes the job efficiently.
Durability and Intended Use
The best garage flooring is one that matches how you use the space. A floor for simple car parking has very different requirements than a surface for a busy home workshop. For example, a quality coating offers excellent resistance to chemicals, prevents concrete dusting, and simplifies cleaning. Many homeowners explore the benefits of coating the floor for these exact reasons. Match the flooring's properties to your needs:
- Chemical Resistance: Essential for workshops to protect against oil, brake fluid, and solvents.
- Impact & Abrasion Resistance: Important if you use jacks, drop tools, or move heavy equipment.
- Hot Tyre Pick-up: A common failure point for low-quality paints. Ensure your choice is rated to resist lifting when a hot tyre parks on it.
- Load Rating: Check that your chosen flooring, particularly tiles, can support the weight of your vehicles, including heavy 4WDs or caravans.
The Top 4 Garage Flooring Options in Australia: A Detailed Breakdown
Selecting the right garage flooring transforms a functional space into a finished part of your home. Before application, ensure your concrete slab is clean, level, and sound, adhering to the standards outlined in Australia's National Construction Code. Below, we detail the four most popular options for Australian homeowners, comparing cost, durability, and application.
| Flooring Type | Estimated Cost (per m²) | Durability | DIY-Friendly? |
|---|---|---|---|
| Concrete Coatings (Paint/Sealer) | A$2 - A$10 | Low | Yes |
| Epoxy / Polyaspartic | A$20 - A$120+ | Very High | Challenging |
| Interlocking Tiles | A$45 - A$90 | High | Yes |
| Roll-Out Vinyl Mats | A$25 - A$60 | Medium-High | Yes |
Option 1: Concrete Coatings (Paint & Sealers)
The most budget-friendly choice for a basic upgrade. Latex or acrylic paints provide colour but little protection. Penetrating concrete sealers (silicate or siliconate) offer better moisture resistance but are not a protective surface coating. This is a simple cosmetic fix rather than a long-term solution.
- Pros: Extremely low cost, simple DIY application with a roller, wide range of colours available.
- Cons: Prone to hot-tyre pickup, chips easily, requires reapplication every 1-2 years.
- Ideal Use: Low-traffic garages or for a quick, inexpensive visual improvement before selling a property.
Option 2: Epoxy & Polyaspartic Coatings
A high-performance system that creates a seamless, durable, and chemical-resistant surface. The process involves grinding the concrete, applying a primer, a coloured base coat (epoxy), and a clear, UV-stable topcoat (often polyaspartic). It delivers a professional, showroom-quality finish that lasts for years.
- Pros: Extremely durable, resistant to oil, chemicals, and abrasions, easy to clean, long lifespan.
- Cons: Professional installation is costly, difficult DIY process, strong fumes during application.
- Ideal Use: Workshops, high-traffic residential garages, and anyone seeking a premium, long-term flooring solution.
Option 3: Interlocking Floor Tiles
A modular and versatile garage flooring solution made from durable polypropylene (PP) or flexible PVC. Tiles snap together easily over your existing concrete, hiding cracks and imperfections without messy prep work. They allow for custom designs, borders, and patterns.
- Pros: Simple DIY installation, individual tiles can be replaced if damaged, excellent durability, hides subfloor issues.
- Cons: Seams can trap dirt and water, higher initial material cost than coatings.
- Ideal Use: Garages with cracked or stained concrete, home gyms, and for homeowners wanting a customisable look.
Option 4: Roll-Out Vinyl Mats
The fastest way to cover a garage floor. These heavy-duty PVC mats are simply unrolled into place. Available in various textures like diamond plate, coin top, or ribbed, they provide a clean, uniform look instantly. Multiple mats can be seamed together for larger spaces.
- Pros: Extremely fast installation, comfortable and anti-fatigue, protects the concrete underneath, easy to clean.
- Cons: Can be heavy to handle, may shift or bubble if not secured, seams are not waterproof.
- Ideal Use: Covering old or damaged concrete quickly, creating a comfortable workspace, or for renters needing a non-permanent solution.
Essential Prep Work: How to Prepare Your Concrete for New Flooring
No garage flooring solution will perform as specified or achieve its maximum lifespan if installed on a poorly prepared surface. A successful, long-lasting result is dependent on the condition of the concrete slab underneath. The foundation for any quality installation is a clean, dry, and structurally sound concrete surface. Follow this checklist for a professional-standard preparation.
Step 1: Thorough Cleaning and Degreasing
Surface contaminants are the primary cause of coating delamination and poor tile adhesion. All oil, grease, chemicals, and dirt must be completely removed. Start by sweeping and vacuuming all loose dust and debris from the entire floor, including corners and edges.
- Apply a heavy-duty concrete degreaser to any oil or grease stains, following the manufacturer's instructions.
- Use a pressure washer to deep clean the entire slab, focusing on stubborn areas. This will remove ground-in dirt and residue.
- Allow the floor to dry completely for at least 24-48 hours before proceeding.
- Safety: Always wear appropriate personal protective equipment (PPE), including safety glasses and chemical-resistant gloves, when handling degreasers.
Step 2: Repairing Cracks and Imperfections
A smooth, level surface is essential for a clean final appearance. Cracks, chips, and spalling concrete will show through most coatings and can create an unstable base for tiles. Minor damage can be addressed with DIY-friendly products.
- Use a wire brush or angle grinder to clean out loose debris from any cracks.
- Fill hairline cracks and small chips with a flexible epoxy crack filler or a cement-based patching compound.
- Ensure the repair material is level with the surrounding concrete. Trowel smooth for a seamless finish.
- Note: Large, deep, or structural cracks may indicate foundation issues and require assessment by a professional contractor.
Step 3: Moisture Testing
Excess moisture vapour transmitting through the concrete slab can cause catastrophic failure for coatings and trap mould-causing dampness under tiles. Before installing your new garage flooring, perform a simple moisture test.
- Tape a 50cm x 50cm square of plastic sheeting to a central part of the concrete floor, sealing all four edges with heavy-duty tape.
- Leave it in place for 24 hours.
- After 24 hours, remove the plastic. If the underside of the plastic or the concrete below it is damp, you have a moisture issue.
- If moisture is present, a moisture barrier primer or sealer must be applied before your flooring.
Step 4: Grinding or Etching (for Coatings)
For epoxy, polyaspartic, or paint coatings to bond correctly, the concrete must have a porous profile, similar to 120-grit sandpaper. A smooth, power-trowelled slab is too dense for coatings to penetrate and adhere.
- Concrete Grinding: The preferred professional method. A floor grinder with a diamond-abrasive disc removes the top layer of concrete, creating an ideal surface profile. Equipment can be hired.
- Acid Etching: A DIY alternative. A solution of muriatic acid or a safer etching product is used to open the pores of the concrete. This method requires extreme caution, proper neutralisation, and thorough rinsing.
- Safety: Grinding creates significant dust and requires a respirator. Acid etching requires full PPE, including acid-resistant boots, gloves, and eye protection.
Finalising Your Garage Flooring Decision
Choosing the right garage flooring is a practical decision that adds significant value and functionality to your home. As we've covered, your choice between durable epoxy coatings, versatile interlocking tiles, or cost-effective paint comes down to balancing cost, aesthetics, and your intended use for the space. No matter which option you select, remember that diligent surface preparation is the non-negotiable foundation for a finish that looks great and lasts for years.
Completing your garage upgrade? Ensure your garage door is just as impressive. A new floor deserves a high-quality, reliable door. At Door Supply, we specialise in Proudly Australian Made doors delivered directly to you. We offer nationwide delivery for DIYers and provide the expert advice you need to select the correct model. Explore our Australian-made roller and sectional doors and complete your project with confidence.
You're now equipped to create a functional and impressive garage space from the ground up.
Frequently Asked Questions
What is the cheapest way to cover a garage floor in Australia?
The most cost-effective option is a concrete sealer or a dedicated garage floor paint. A DIY kit from a hardware store can cost between A$100 to A$300 for a standard double garage. This provides a clean look and protects against minor spills and dust. While not as durable as epoxy or tiles, it is the cheapest initial outlay for improving your concrete slab and can be easily reapplied as needed for basic upkeep.
How long does epoxy garage flooring last?
A professionally installed epoxy garage floor can last 10 to 20 years, or even longer with proper care. Longevity depends on the quality of the concrete preparation, the thickness and type of epoxy used, and the level of use. DIY kits typically have a shorter lifespan of 2 to 5 years. Heavy traffic, dropped tools, and chemical spills will impact the durability of any epoxy coating, making quality installation a key factor for a long-term solution.
Are interlocking garage floor tiles worth the cost?
For many applications, yes. While the initial cost per square metre is higher than paint, interlocking tiles offer significant value. They require minimal floor preparation, hide cracks and stains effectively, and are extremely durable. Installation is a simple DIY task, and individual tiles can be replaced if damaged. They also offer excellent thermal and acoustic insulation. If you need a fast, robust, and versatile solution, they are a worthwhile investment.
Can you put new flooring over a cracked or damaged garage floor?
It depends on the flooring type. Coatings like paint and epoxy require a sound surface; all major cracks and damage must be repaired and the floor ground smooth for proper adhesion. However, interlocking tiles are an excellent solution for damaged floors. They are designed to be laid directly over minor cracks and imperfections, saving significant time and cost on concrete preparation. For major structural issues, always consult a professional first.
What is the most durable type of garage flooring?
For sheer chemical and abrasion resistance, a professionally installed polyaspartic or 100% solids epoxy coating is the most durable option. These systems create a seamless, hardened surface that resists hot tyres, oil, and impacts. For durability against a poor quality or cracked concrete slab, high-density PVC interlocking tiles are superior. They absorb impacts without cracking and are not dependent on the condition of the subfloor for their structural integrity.
How do you clean and maintain different types of garage floors?
Maintenance is straightforward for most quality garage flooring. For epoxy and other coatings, regular sweeping and mopping with a pH-neutral cleaner is sufficient. Avoid acidic or soap-based cleaners that can dull the finish. Interlocking tiles can be swept, vacuumed, or mopped with a mild detergent. For concrete sealers and paints, regular sweeping is key to prevent abrasion, with periodic mopping as needed. Always clean chemical spills promptly on any surface.