
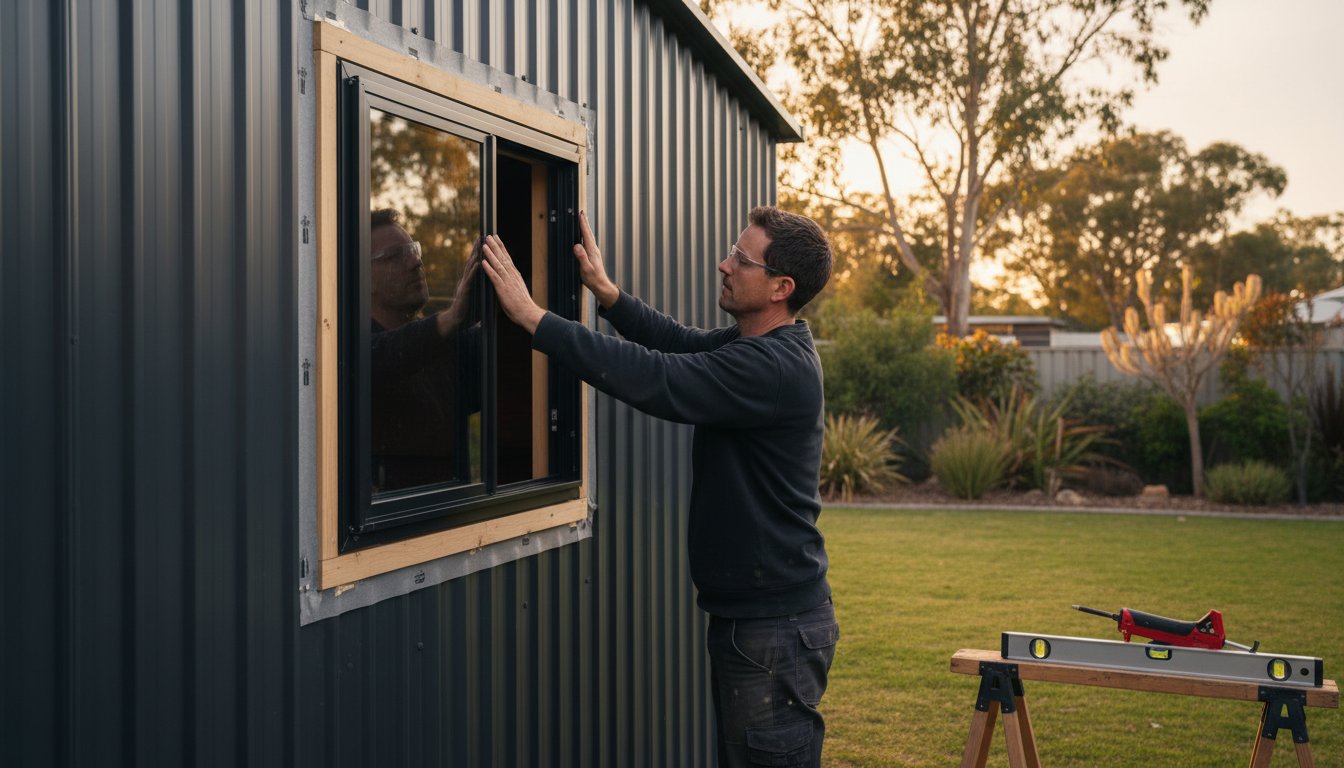
Cutting an opening in your shed wall is the most critical part of the job. A mistake in measurement or placement can lead to leaks, an insecure frame, or even damage to the shed’s structural integrity. These concerns often stop a DIY project before it starts. However, the correct approach removes the guesswork and risk. This guide provides the direct, no-nonsense instructions required to properly install a shed window, adding valuable light and ventilation to your space.
Follow our complete process for a secure, weatherproof installation. We provide the specific steps for measuring, cutting, and framing the opening in both timber and metal-clad sheds. You will learn the correct techniques for waterproofing and sealing the frame to prevent water ingress. By adhering to these instructions, you will achieve a professional-quality result: a window that is level, secure, and built to last, giving you the confidence to complete the installation without professional help.
Key Takeaways
- Master the most critical step: Accurately measuring and marking the rough opening is essential for a professional, leak-free fit.
- Discover the correct weatherproofing techniques to create a waterproof barrier, preventing costly leaks and water damage to your shed.
- Get step-by-step instructions on how to properly cut an opening and install a shed window in both timber and metal walls.
- Understand the key finishing touches and common mistakes to avoid, ensuring your new window is secure and durable for years to come.
Before You Begin: Tools, Materials, and Preparation
Proper preparation is the foundation for a successful and weatherproof window installation. This guide focuses on flanged windows, the most common and practical type for timber or steel shed walls. Before you make the first cut, gathering the correct tools and materials will ensure the project to install shed window goes smoothly and results in a professional, leak-free finish.
This video provides a practical overview of the process:
Before proceeding, complete these critical pre-installation checks:
- Safety First: Always wear appropriate Personal Protective Equipment (PPE), including safety glasses, work gloves, and hearing protection when using power tools.
- Check Your Warranty: Cutting into a shed wall may void the manufacturer's warranty. Review your purchase documents before making any modifications.
- Inspect the Wall: From both inside and outside, confirm the selected installation area is clear of structural framing, bracing, or electrical wiring. Choosing a clear bay between studs is ideal.
Essential Tools Checklist
Having these tools on hand will streamline the installation process. Ensure all power tool batteries are fully charged.
- Tape measure, pencil, and spirit level
- Power drill with various bits, including a small bit for pilot holes
- Cutting tool (angle grinder with a cut-off wheel for metal sheds; jigsaw or reciprocating saw for timber sheds)
- Caulking gun for sealant application
- Utility knife
Required Materials List
Source these materials before you begin work. Using high-quality components is essential for a durable, long-lasting result.
- The shed window unit (flanged type)
- High-quality exterior-grade silicone sealant (neutral cure)
- Self-adhesive flashing tape: Recommended for all installations to create a waterproof seal. Proper application of this tape is a fundamental part of effective Weatherproofing and flashing, preventing water ingress and protecting your shed's structure.
- Fasteners (screws) suitable for your shed's wall material (e.g., metal-drilling screws for steel, exterior-grade timber screws for wood)
Step 1: Measuring and Marking the Rough Opening
Correct measurement is the most critical part of the entire process. The old saying "measure twice, cut once" is non-negotiable when you plan to install shed window units. This step ensures the structural integrity of your shed wall and a professional, weather-tight finish. The goal is to create a 'rough opening'-the hole in the wall where the window will sit. This opening must be slightly larger than the window frame itself to allow for final adjustments and proper sealing. While this guide provides standard procedures, always consult the specific instructions from your window manufacturer for the exact required dimensions. Getting this part right is crucial for a successful step-by-step shed window installation.
How to Determine the Rough Opening Size
Calculating the correct dimensions for your rough opening is a straightforward process. The key is to measure the window unit itself, not the packaging or listed nominal size. You need the exact physical dimensions of the frame that will sit inside the wall.
- Measure the Window Frame: Using a tape measure, find the exact height and width of the main body of your sliding window. Do not include any protruding nailing fins or mounting flanges in this measurement.
- Add an Allowance: Add 5mm to 10mm to both your height and width measurements. For example, if your window frame is 600mm x 800mm, your target rough opening size will be approximately 610mm x 810mm.
- Record the Dimensions: Write these final rough opening dimensions down. This small gap is not a mistake; it provides crucial tolerance for shimming the window perfectly level and plumb and allows space for sealant or expanding foam.
Marking the Cut Lines on the Shed Wall
Once you have your final rough opening dimensions, you can transfer them onto the shed wall. Before you draw any lines, it is wise to use a stud finder to locate the vertical studs inside the wall. Ideally, you want to place your window between two existing studs to minimise the need for complex reframing.
- Choose the Location: Decide on the exact placement for your window.
- Mark the Bottom Line: Use a spirit level to draw a perfectly level line for the bottom of the rough opening.
- Mark Top and Side Lines: From the bottom line, measure up to the required height and mark the top line. Then, measure across and mark the two vertical side lines.
- Check for Square: Use a builder's square on all four corners to ensure they are perfect 90-degree angles. An out-of-square opening will make it extremely difficult to install the shed window correctly. Re-measure everything one last time before you pick up a saw.
Step 2: Cutting the Opening in Your Shed Wall
With your opening marked, the next critical step is cutting the wall. The correct tool and technique depend entirely on your shed's construction material. Precision is key-always cut slowly and aim to stay just inside your marked lines. This allows for minor adjustments when you fit the window frame. For safety and a cleaner result, have a helper support the cutout section from the inside as you make the final cut. This prevents the panel from falling and tearing the wall cladding or damaging the frame.
This stage requires careful handling of power tools. Always wear appropriate personal protective equipment (PPE), including safety glasses, hearing protection, and sturdy gloves.
For Metal Clad Sheds
Metal sheds require a tool that can handle steel sheeting without buckling it. An angle grinder fitted with a metal-cutting disc is the most effective choice. The goal is to make four straight, clean cuts between your corner markers.
- Drill Pilot Holes: Using a metal drill bit, drill a pilot hole in each of the four corners of your marked rectangle. Make these holes large enough for the cutting disc to enter easily.
- Cut Straight Lines: Start at one pilot hole and carefully guide the angle grinder to the next. Let the tool do the work and focus on maintaining a straight line. Repeat for all four sides.
- De-burr Edges: The cut metal will have extremely sharp edges. This is a crucial safety step when you install shed window components. Use a metal file to smooth all four sides of the opening, removing any burrs for a safe and professional finish.
For Timber or Plywood Sheds
Cutting timber or plywood walls offers more flexibility. A reciprocating saw is ideal for its power and reach, while a jigsaw provides excellent control. The main objective is to achieve a clean opening without splintering the wood surface.
- Drill a Starter Hole: Drill a hole approximately 10-12mm in diameter just inside one of the corners. This will be the entry point for your saw blade.
- Check Blade Depth: Ensure your saw blade is long enough to cut completely through the wall cladding and any internal framing studs. You may need to remove internal linings first.
- Cut with Care: Insert the blade into the starter hole and begin cutting along your marked line. Maintain a steady, deliberate pace to minimise vibration and prevent the wood from splintering.
Step 3: Weatherproofing the Rough Opening
Proper weatherproofing is not an optional step; it is essential for preventing leaks, rot, and long-term water damage to your shed's structure. Before installing the window, you must create a complete waterproof barrier around the rough opening. This is particularly critical in Australian climates prone to driving rain and storms. Skipping this procedure will almost certainly lead to costly repairs in the future.
The most effective and recommended material for this task is a self-adhesive flashing tape, sometimes known as sill tape or flashing membrane. This product creates a durable, waterproof seal that integrates with your shed's wall cladding and protects the timber frame from moisture. This barrier is the primary defence against water ingress after you install shed window frames.
Applying Flashing Tape Correctly
The sequence of application is crucial for creating a weather-tight seal. To be effective, the tape must be layered in a way that directs water downwards and over the top of the piece below it, a method known as "shingling." This ensures there are no seams or edges where water can penetrate.
- 1. Bottom Sill: Start at the bottom of the rough opening. Cut a piece of flashing tape long enough to extend approximately 150mm past the opening on both sides. Apply it firmly along the bottom sill, pressing it down into the opening and then flat against the exterior wall cladding.
- 2. Vertical Sides: Next, apply tape to the two vertical sides (jambs). These pieces must overlap the bottom sill tape you just installed. Ensure they extend above the top of the opening.
- 3. Top Header: Finally, apply the last piece of flashing tape along the top of the opening (the header). This top piece must overlap both of the side pieces. This completes the shingling effect, guaranteeing water flows down and away.
Preparing for the Window Seal
A strong, permanent seal requires a clean surface. Before proceeding, use a clean, dry cloth to wipe down the exterior shed wall immediately surrounding the flashed opening. This removes any sawdust, dirt, or debris that could prevent the silicone sealant from creating a strong, watertight bond with the wall surface. Have your caulking gun loaded with a quality exterior-grade silicone sealant and ready for the next step. Proper preparation here makes the final window installation faster and more effective.
Step 4: Setting, Securing, and Sealing the Window
You have now reached the final installation stage. For this critical step, we strongly recommend having a second person assist. They can hold the window securely in place from the outside while you work from the inside, ensuring the unit doesn't shift during fastening. The goal is to achieve a perfectly level, plumb, and weatherproof fit, which is essential for the window's long-term function and durability.
Applying Sealant and Placing the Window
Before fitting the window, apply a continuous 5-6mm bead of high-quality, weatherproof silicone sealant to the back of the window's mounting flange. This is the flat surface that will sit flush against your shed's exterior wall. With your helper supporting the weight, carefully lift the window and press it firmly into the prepared opening from the outside. Ensure it is centred in the rough opening, with an equal gap around the entire frame.
Fastening the Window to the Wall
Move inside the shed to secure the unit. This is the most important part of the process to install shed window frames correctly.
- Check for Level and Plumb: Place a spirit level on the bottom window sill to confirm it is perfectly level. Then, hold the level vertically against the side jamb to ensure it is plumb. Adjust the window's position slightly until it is correct.
- Secure the Frame: Drive screws through the pre-drilled holes in the mounting flange into the shed's framing. Use screws appropriate for your wall material-typically, self-tapping metal screws for a steel shed or galvanised wood screws for a timber-framed structure.
- Avoid Overtightening: Fasten the screws until they are snug, but do not overtighten. Applying too much pressure can warp the aluminium frame, causing the sliding sash to bind or operate poorly.
Final Exterior Sealing
To guarantee a fully weatherproof installation, apply a final, neat bead of silicone sealant around the entire exterior perimeter of the window flange. This bead covers the joint where the flange meets the shed's wall cladding, creating an impenetrable barrier against rain and drafts. For a clean, professional finish, smooth the silicone bead using a caulking tool or a wet finger immediately after application. Once cured, your window is fully installed and ready for use.
Need a high-quality, Australian-made window for your project? Browse our durable shed and garage windows at doorsupply.com.au.
Finishing Touches and Common Mistakes to Avoid
A successful installation isn't finished once the window is screwed in. The final steps are crucial for ensuring a professional look, long-term weather resistance, and durability. Properly finishing your project when you install shed window units prevents future headaches like leaks and draughts. A few extra minutes spent here makes a significant difference.
Optional: Adding Interior Trim
For a clean, professional finish inside your shed, consider adding interior trim (also known as architrave). This timber moulding covers the gap between the window's frame and your interior wall lining. It hides the cut edge of the wall panel and any shims used. Simply measure the top, bottom, and sides of the window, cut your trim pieces to size (typically with 45-degree mitre cuts at the corners), and fix them in place with a nail gun or small finishing nails.
Once the trim is installed, a quality paint job protects the new timber and integrates the window with your shed's overall aesthetic. For those aiming for a truly professional result on the entire shed, services like Performance Painting can deliver a durable finish that enhances and protects your structure.
Common Installation Mistakes
Avoiding common errors is just as important as following the correct steps. A mistake made during installation can compromise the window's performance and lead to costly repairs down the track. Pay close attention to these frequent pitfalls.
- Cutting the rough opening incorrectly: An opening that is too large makes it difficult to secure and seal the window properly. An opening that is not perfectly square will prevent the window from sitting flush, which can impede its sliding function and create gaps for water to enter. Always double-check your measurements before cutting.
- Forgetting to apply flashing tape: This is the most critical mistake to avoid. Self-adhesive flashing tape applied over the sill and side flanges is your main line of defence against water ingress. Skipping this step will almost guarantee leaks, leading to water damage and rot in your shed's frame.
- Overtightening screws: It is easy to overtighten the fixing screws, especially with a power drill. Doing so can distort or crack the window frame, particularly on aluminium or uPVC units. This can prevent the sash from sliding smoothly and compromise the weather seals. Tighten screws until they are snug, but do not warp the frame.
- Using interior-grade sealant: Never use standard acrylic gap filler for the exterior seal. It is not designed to withstand rain and harsh Australian UV exposure and will quickly fail. Always use a high-quality, exterior-grade neutral cure silicone for a durable, flexible, and waterproof seal.
Once your sealant has fully cured, give the new window and the surrounding area a final clean to remove any dust, smudges, or excess sealant. Your new shed window is now ready for years of reliable service.
For other high-quality shed components and accessories, browse the complete range at doorsupply.com.au.
Finalising Your Shed Window Installation
You now have a complete roadmap to successfully install a shed window. The key to a professional result is precise measurement of the rough opening and meticulous weatherproofing. Getting these two steps right ensures your new window is not only secure but also protected from the elements for years to come, preventing costly issues down the track.
When you're ready for a high-quality finish, choose a window built to last. Door Supply is a supply-only service for the confident DIYer, providing sliding glass windows that are Proudly Australian Made and Manufactured. Designed for durability, they are the ideal, low-maintenance choice for any shed project.
Complete your project with a window that matches your workmanship. View our range of Australian-made sliding glass windows and enjoy the new light and ventilation in your shed.
Frequently Asked Questions
What size should the rough opening be for my shed window?
The rough opening must be slightly larger than the window frame to allow for squaring and sealing. As a general rule, measure the exact height and width of your window unit and add 10-15mm to each dimension. For example, a 600mm x 600mm window requires a rough opening of approximately 610mm x 610mm. Always confirm the manufacturer’s specific recommendations before cutting, as tolerances can vary between products. This is a critical step to correctly install shed window units.
How do I make sure the shed window is completely waterproof?
Waterproofing relies on three key components: flashing, sealant, and correct installation. Apply self-adhesive flashing tape over the timber frame, starting with the sill, then the sides, and finally the top piece, overlapping each layer. Apply a continuous bead of high-quality polyurethane or silicone sealant to the back of the window’s mounting flange before fitting it into the opening. This creates a primary barrier against water ingress, ensuring a durable, weather-tight seal for years to come.
Do I need to add a timber frame inside the opening of a metal shed?
Yes, a timber sub-frame is essential. Metal shed cladding lacks the structural rigidity to support a window and provide a secure fixing point. Building a simple timber frame (using 70x35mm or 90x45mm treated pine) inside the rough opening provides a solid surface to screw the window into. It also prevents the thin metal sheeting from warping or buckling under the window’s weight and ensures a flush, professional finish.
Can I install a window in any part of a shed wall?
No, placement is dictated by the shed’s structural frame. You must install a window between the existing wall studs. Cutting through a stud will compromise the wall's integrity and strength. Before cutting, locate the studs from inside the shed and plan your window placement to fit neatly between them. Also consider a practical height from the floor that allows for good light and ventilation without creating a security risk.
What are the best tools for cutting a hole in a metal shed wall?
For straight, fast cuts in typical steel cladding, an angle grinder with a thin metal-cutting disc is the most efficient tool. For greater precision or curved corners, a jigsaw fitted with a fine-toothed metal-cutting blade is a good alternative. For thinner, corrugated sheeting, a pair of power shears or quality tin snips can also provide a clean cut with less noise and fewer sparks. Always wear appropriate safety gear, including eye and ear protection.
Is it better to put sealant on the wall or on the window flange?
It is always better to apply the sealant directly to the back of the window's mounting flange. Applying a continuous, unbroken bead of sealant to the flange ensures that when the window is pushed into place, the sealant spreads evenly to create a complete, watertight gasket between the flange and the wall cladding. This method is more reliable and less messy than attempting to apply a perfectly straight and consistent bead of sealant onto the wall itself.