DIY home improvement projects are more popular than ever, especially as homeowners look to enhance both the security and functionality of their spaces in 2025. One critical area often overlooked is the garage, where the right door can make a world of difference.
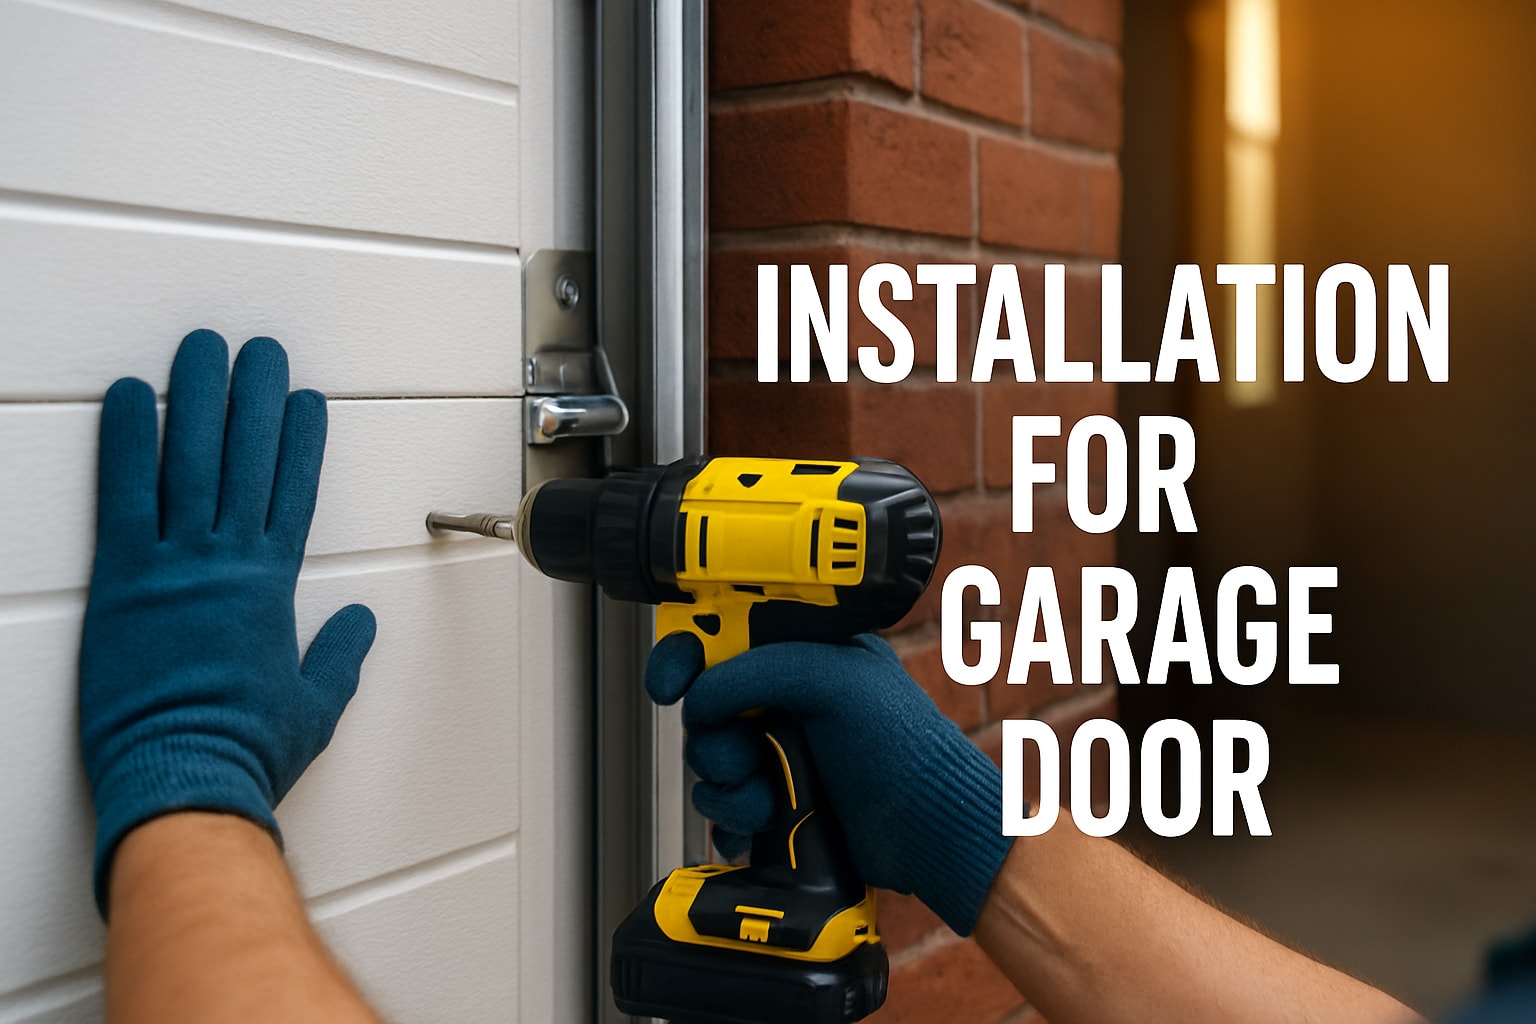
Many people face challenges with installation for garage door, including concerns about safety, door compatibility, and keeping costs in check. These issues can seem daunting, but the rewards are substantial.
A well-installed garage door offers better security, improved energy efficiency, and even a boost to your property’s value. This article is your comprehensive, step-by-step guide to installation for garage door in 2025. You will learn how to prepare, what tools you need, the best installation practices, key safety tips, and troubleshooting advice.
Understanding Garage Door Types and Choosing the Right One
Choosing the right garage door is the first and most crucial step for a successful installation for garage door projects. The wide variety of styles, materials, and features can make this decision challenging, so a clear understanding of your options is essential.

Overview of Garage Door Styles
Garage doors come in four main styles: roller, sectional, tilt, and side-hinged. Each has unique benefits and is suited to different garage spaces.
- Roller doors roll vertically into a compact drum above the opening, ideal for garages with limited ceiling space.
- Sectional doors consist of horizontal panels that slide upwards, providing a sleek look and efficient use of space.
- Tilt doors are a single solid panel that tilts outward and upward, suitable for wider openings but need more clearance.
- Side-hinged doors open outwards like traditional doors, offering easy pedestrian access but require more driveway space.
The choice impacts the installation for garage door process, as some styles are simpler for DIY. For a detailed comparison, see Garage Door Types and Materials.
Material Selection and Durability
Selecting the right material for your garage door affects durability, maintenance, insulation, and security. Common options include steel, aluminium, timber, and composites.
- Steel doors are popular for their strength, security, and low maintenance. They resist warping and are ideal for busy households.
- Timber offers classic style and natural insulation but requires regular sealing or painting to prevent weather damage.
- Aluminium is lightweight and resistant to corrosion, making it suitable for coastal locations, though it may dent more easily.
- Composites combine materials for better insulation and reduced upkeep.
When planning your installation for garage door, weigh the trade-offs between appearance, longevity, and the time you can dedicate to maintenance.
Insulation and Energy Efficiency
Modern garages often double as workshops or storage, so insulation is vital. Insulated garage doors help regulate temperature, reducing energy loss by up to 20 percent according to industry data.
Proper insulation not only improves comfort but also lowers heating and cooling costs. When selecting a door for installation for garage door, check the insulation rating and opt for models with thermal breaks or insulated cores.
Sizing and Measurement Essentials
Accurate measurement is fundamental for a smooth installation for garage door experience. Measure the width and height of your garage opening at multiple points, noting any irregularities.
Common mistakes include measuring only at one spot or forgetting to account for tracks and hardware. Always refer to manufacturer guidelines for clearance requirements.
Smart Features and Automation
Today’s garage doors can integrate with smart home systems, offering remote operation and enhanced security. Features like Wi-Fi enabled openers and app controls are increasingly standard.
During installation for garage door, consider future-proofing with smart technology, enabling convenient monitoring and management from your mobile device.
Cost Factors and Budget Planning
Garage door prices vary by type, material, and features. Roller doors are generally more budget-friendly, while sectional doors offer premium aesthetics. Professional installation averages $800 to $1500, but DIY installation for garage door can save up to 40 percent.
Factor in additional costs for openers, insulation, and smart features. Careful planning ensures you stay within budget without sacrificing quality.
Regulatory and Safety Standards in Australia
All garage doors must comply with Australian standards (AS/NZS 4505:2012) for safety and wind resistance. In cyclone-prone regions, choose wind-rated doors to meet local council requirements.
Confirm your chosen door’s compliance before starting installation for garage door, as meeting these standards protects your home and ensures insurance validity.
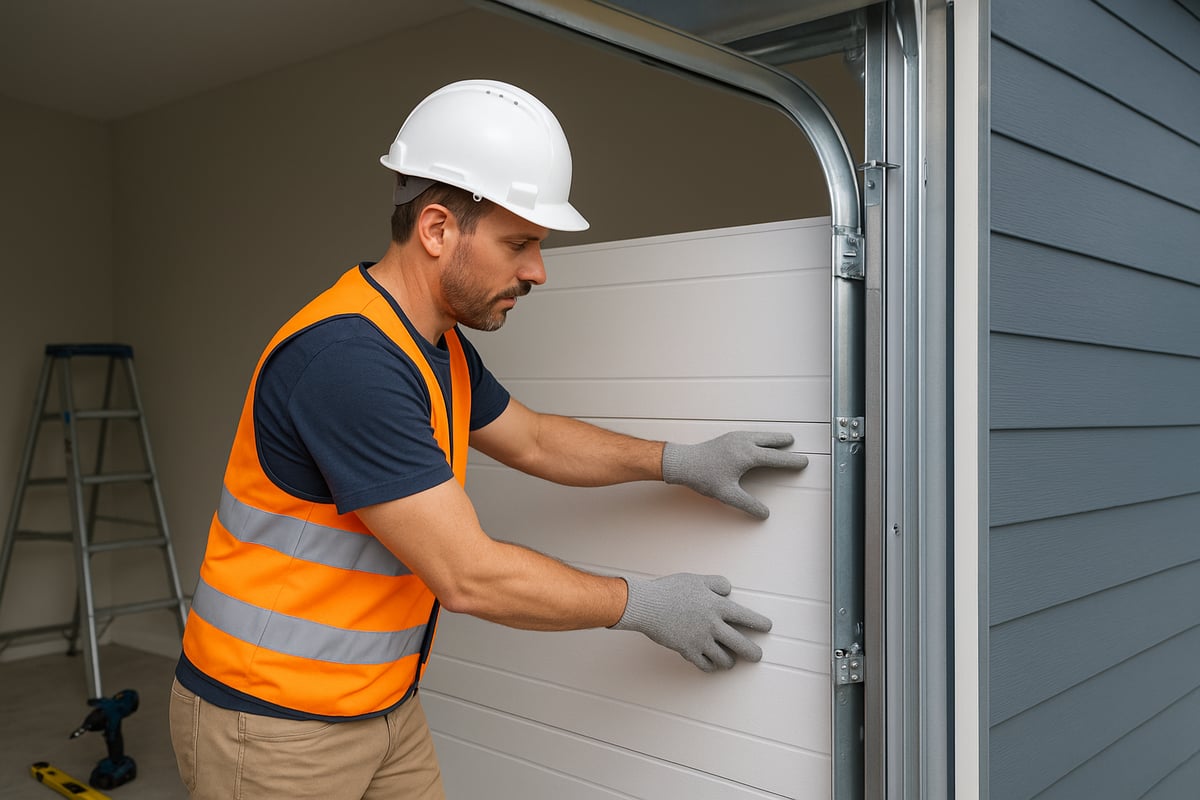
Preparation: Tools, Materials, and Site Readiness
Proper preparation is the cornerstone of a smooth installation for garage door projects. Before you begin, make sure you have all the necessary tools, materials, and a clear workspace. This attention to detail helps avoid delays and ensures a safe, efficient process from start to finish.

Essential Tools and Equipment
Every successful installation for garage door projects begins with having the correct tools at hand. You will need a power drill, spirit level, socket set, ladder, safety goggles, and sturdy gloves. Using the right equipment is crucial for both safety and precision, reducing the risk of injury or costly mistakes.
For step-by-step procedures, consult the How to Install a Roller Door guide, which details tool use and setup.
Materials Checklist
Before starting installation for garage door systems, review your materials checklist. A standard garage door kit includes panels, tracks, rollers, springs, and mounting hardware. You may also need additional items such as weatherstripping, fasteners, and quality sealant to ensure a proper fit and finish.
| Item | Included in Kit | Additional Needed |
|---|---|---|
| Door panels | Yes | No |
| Tracks | Yes | No |
| Rollers | Yes | No |
| Springs | Yes | No |
| Weatherstripping | No | Yes |
| Sealant | No | Yes |
Site Assessment and Clearance
A thorough site assessment is vital before installation for garage door assemblies. Remove any vehicles, tools, or debris from the area to create a safe, accessible workspace. Inspect the garage frame and floor for structural issues, such as cracks or warping, that could affect the installation outcome.
Ensuring the site is clear and stable helps prevent accidents and streamlines the workflow.
Safety Precautions and PPE
Safety should always be your top priority. Equip yourself with personal protective equipment: gloves, safety goggles, and steel-toe boots. These items protect against sharp edges, falling hardware, and accidental slips.
Statistics show over 7,000 garage door injuries occur annually in Australia, highlighting the importance of proper PPE. Always use tools as intended and follow safety guidelines throughout the process.
Reading Manufacturer’s Instructions
Before you begin, carefully review the manufacturer’s instructions and installation diagrams. Each garage door type, such as roller, sectional, or tilt doors, may have unique assembly steps.
Pay close attention to the sequence of installation and any special notes regarding hardware or adjustment. Following these guidelines helps avoid common errors and ensures compliance with warranty conditions.
Scheduling and Time Management
Allocate sufficient time for your installation for garage door project. Most DIY installations take between 4 and 6 hours, depending on experience and garage door type. Plan your work on a day with good weather, as rain or wind can hinder progress and pose safety risks.
Prepare a checklist and set realistic milestones to keep your project on track, ensuring a smooth and stress-free experience.
Step-by-Step Guide to Garage Door Installation
Embarking on an installation for garage door project can seem daunting, but following a clear, structured process ensures safety and success. Whether replacing an old door or fitting a new build, this guide breaks down each task for confident DIY results in 2025.
Step 1: Removing the Old Garage Door (If Applicable)
The first step in any installation for garage door project is to prepare the site by removing the existing door, if present. Begin by disconnecting the power to the garage door opener to prevent accidental activation. Use locking pliers to secure the tracks and keep the door from moving unexpectedly.
Carefully detach the tension from the springs, following manufacturer guidelines. Springs are under high pressure and require precise handling to avoid injury. Disengage the door from the opener, then unscrew and remove all hardware securing the door panels or curtain to the track system.
Once the door is free, gently lower and remove each section or roll, depending on the door type. Dispose of old materials responsibly, recycling metal parts where possible. Inspect the opening for damage or wear that could affect the new installation for garage door, addressing any frame repairs before proceeding.
Step 2: Assembling the New Door Components
Lay out all components from the garage door kit in a clean, accessible workspace. Each installation for garage door involves panels (for sectional), or a curtain (for roller), tracks, rollers, hinges, and all necessary hardware. Read through the instructions, checking the parts list to ensure nothing is missing.
Start with pre-assembly tasks as recommended. For sectional doors, attach hinges and handles to panels before stacking. For roller doors, ensure the curtain is correctly oriented and the axle brackets are secured. Group hardware by type for efficient workflow.
Organising everything before mounting reduces installation time and errors. If the door includes insulation panels or decorative inserts, install these now according to manufacturer instructions. Proper preparation at this stage leads to a smoother installation for garage door and helps avoid common DIY setbacks.
Step 3: Installing Tracks and Hardware
Begin the core installation for garage door by positioning the vertical tracks on either side of the opening. Use a spirit level to confirm each track is perfectly plumb. Secure tracks with fasteners, drilling into the frame or masonry as required by the design.
Attach horizontal tracks, ensuring they are parallel to the floor and aligned with the vertical sections. Double-check all measurements, as misalignment at this stage can cause operational issues. If you are installing in a region like Sydney, review Garage Doors Sydney Installation for tips on local standards and best practices.
Install brackets and supports, verifying everything is tight and secure. This step in the installation for garage door process lays the foundation for smooth movement and longevity. Take extra care with anchor points, as these bear the weight of the door in daily use.
Step 4: Mounting the Door Panels or Curtain
With the tracks in place, proceed to mount the panels or curtain as your installation for garage door requires. For sectional doors, start with the bottom panel, ensuring it sits squarely in the track. Secure with hinges and fasteners, then stack and attach each subsequent panel, checking alignment as you go.
For roller doors, lift the curtain onto the axle and position it in the brackets. Carefully unroll, guiding the curtain into the tracks. Avoid forcing components, as this can cause misalignment or damage.
Use temporary supports if needed to keep panels steady during fastening. The correct sequence and patience here are crucial for a seamless installation for garage door, ensuring the door glides smoothly and sits flush with the frame.
Step 5: Attaching and Adjusting Springs
Springs are vital in any installation for garage door, counterbalancing the weight and enabling easy operation. Identify whether your system uses torsion or extension springs. For torsion springs, mount the spring bar above the door, securing it with set screws.
Using winding bars, gradually add tension, following the manufacturer’s specified number of turns. Always wear safety goggles and gloves, as springs can be hazardous if mishandled. For extension springs, attach them to the rear track supports, then connect safety cables as a backup in case of breakage.
Test the tension by manually lifting the door. It should move smoothly and stay in place when partially open. If it drops or feels heavy, adjust the springs incrementally. Proper spring setup is a key safety point in installation for garage door and directly affects door performance.
Step 6: Installing the Opener System
Next in the installation for garage door process is fitting the automatic opener. Position the motor unit centrally above the door, using a mounting bracket secured to the ceiling. Assemble the drive rail and connect it to the door arm as per your opener’s instructions.
Install the safety sensors on either side of the door, about 150 mm above the floor. Ensure sensors face each other and are free from obstructions. Route wiring neatly, avoiding moving parts and pinch points.
Plug in and program the opener, setting travel limits and force sensitivity. Test remote operation, confirming smooth start and stop. As modern homes adopt automation, integrating a smart opener is now standard in installation for garage door, offering convenience and enhanced security.
Step 7: Testing and Balancing the Door
Testing is essential for a safe, reliable installation for garage door. Disengage the opener and manually lift the door, checking for smooth, balanced movement. The door should remain in place at mid-height without drifting up or down.
Re-engage the opener and cycle the door through several open and close operations. Listen for unusual noises and observe movement for any sticking or jerking. Adjust spring tension or track alignment if needed.
Perform safety checks on the auto-reverse function by placing a small object in the door’s path. The door should reverse immediately upon contact. Recalibrate sensors and settings to ensure compliance. This step validates the quality of your installation for garage door and confirms the system’s readiness for everyday use.
Step 8: Final Safety Checks and Finishing Touches
The last stage of installation for garage door focuses on inspection and finishing. Tighten all fasteners, check brackets for stability, and verify the tracks are free of debris. Lubricate rollers, hinges, and springs with a silicone-based product to reduce wear and noise.
Install weatherstripping along the bottom and sides of the door to seal gaps and improve energy efficiency. Clean the door surface and remove fingerprints or residue from installation activities.
Review the manufacturer’s checklist, ensuring every item is complete. Register your new door for warranty and document the installation for future maintenance. A thorough final review ensures your installation for garage door meets Australian standards and provides peace of mind for years to come.
[DoorSupply: Custom Garage Doors and DIY Support] (https://www.doorsupply.com.au)
DoorSupply is a leading choice for anyone considering installation for garage door projects in Australia. Their custom-made roller and sectional garage doors are manufactured locally for seamless DIY installation.
![[DoorSupply: Custom Garage Doors and DIY Support] (https://www.doorsupply.com.au)](https://xqvnmkjynbkcujcrtubi.supabase.co/storage/v1/object/public/article-images/4a4107ac-a7fa-4ee4-8c71-16a900f45b6c/article-4a4107ac-a7fa-4ee4-8c7-a-high-quality-realistic-photograph-of-a-homeowner-3-ztl5av.jpg)
Key features of DoorSupply:
- Order garage doors to exact measurements, ensuring a perfect fit for every garage.
- Choose from a wide selection of finishes. For those interested in personalising their installation for garage door, see the Colorbond Colour Options for inspiration.
- Select wind-rated doors for cyclone-prone areas, meeting all Australian safety and wind standards.
- Compatible with major opener brands including Merlin and ATA, with easy access to spare parts and accessories.
- Receive detailed PDF installation guides, direct support via phone or email, and free delivery in most major Australian cities.
Every product is manufactured in Melbourne using premium Bluescope steel, maintaining strict compliance with national standards. DoorSupply’s online platform streamlines the process, offering instant pricing, secure ordering, and full customisation options.
DIY homeowners benefit from expert support, cost savings, and confidence throughout the installation for garage door process. Builders and contractors also appreciate the convenience and reliability DoorSupply brings to every project.
Safety, Troubleshooting, and Maintenance Tips
A successful installation for garage door projects does not end when the door closes for the first time. Safety, troubleshooting, and maintenance are vital for reliable operation and peace of mind. This section covers crucial tips to help you stay safe, solve common issues, and extend the lifespan of your new garage door.
Essential Safety Considerations During and After Installation
Always prioritise safety during installation for garage door projects. Springs and panels are heavy and can cause serious injuries if handled incorrectly. Wear personal protective equipment, including gloves, goggles, and sturdy footwear.
Double-check all fasteners and supports after installation. Ensure the tracks are secure and that no loose hardware remains. According to Garage Door Safety Statistics in Australia, thousands of injuries occur annually during garage door installations, often due to overlooked safety steps.
Teach all household members about safe operation. Never let children play with remote openers or attempt repairs. Regularly test the auto-reverse function to prevent accidents.
Common Installation Problems and Solutions
Even with careful planning, issues can arise during installation for garage door projects. One frequent problem is a door that will not open or close smoothly. This is often due to misaligned tracks or incorrect spring tension.
If the motor fails to operate, check the power supply, remote batteries, and sensor alignment. A common fix involves straightening the photo-eye sensor, which restores the auto-reverse function.
Here is a quick troubleshooting table:
| Problem | Likely Cause | Solution |
|---|---|---|
| Door sticks | Track misalignment | Adjust and level tracks |
| Motor unresponsive | Power or wiring issue | Inspect connections |
| Auto-reverse failure | Sensor misaligned | Realign sensors |
Addressing these issues promptly ensures your installation for garage door remains safe and functional.
Maintenance Routines for Longevity
Routine upkeep is essential after any installation for garage door. Lubricate all moving parts, including rollers, hinges, and springs, every six months. Use a silicone-based lubricant for best results.
Inspect weather seals and replace them if you notice cracking or wear. Clean the tracks with a damp cloth to remove dust and debris. A regular maintenance schedule reduces the risk of breakdowns and keeps your door operating smoothly.
Keep a maintenance log to track all servicing activities. Early detection of wear or unusual noises can prevent costly repairs in the future.
When to Call a Professional
Some issues are beyond the typical scope of DIY installation for garage door tasks. If you notice severe misalignment, broken springs, or structural damage, it is time to call a professional. Attempting complex repairs without expertise can be dangerous.
Industry data shows that 25% of garage door repairs require professional intervention. Professionals have the tools and training to handle high-tension springs and complex electrical systems safely.
Do not hesitate to seek help if you are unsure about any aspect of your garage door’s operation. It is better to invest in expert advice than risk injury or further damage.
Upgrading and Retrofitting Older Doors
After your initial installation for garage door, consider upgrading older doors with modern features. Adding insulation improves energy efficiency and comfort, especially in extreme climates.
Retrofitting smart controls or new automatic openers can enhance convenience and security. Compare the costs and benefits of upgrades versus full replacement. Sometimes, new features can be added at a fraction of the cost of a new door.
Assess the structure of your existing door to ensure compatibility with upgrades. Consult product manuals or professionals for best results.
Warranty and Compliance Checks
Register your product after installation for garage door to activate warranty coverage. Keep all documentation in a safe place for future reference.
Ensure your door complies with relevant Australian standards. Refer to AS/NZS 4505:2012 Garage Door Standards for details on design, wind ratings, and installation requirements.
Check with your local council about ongoing compliance and permit obligations. Regularly reviewing compliance helps avoid legal issues and ensures long-term safety for your property.
Frequently Asked Questions About Garage Door Installation
Installing a new garage door often raises many questions for DIYers and homeowners. Here, we address the most common concerns related to installation for garage door projects, ensuring you have clear, expert-backed guidance for every step.
How long does installation typically take for a DIYer?
For most homeowners, installation for garage door projects usually takes between 4 to 6 hours. Roller doors are generally quicker, often completed in under 4 hours, while sectional doors may require more time due to additional panels and hardware. Always allow extra time for checking alignment and safety features.
What are the most common mistakes to avoid?
Some frequent errors during installation for garage door tasks include inaccurate measurements, incorrect spring tensioning, and forgetting essential safety checks. To avoid issues, double-check your measurements before ordering, follow the manufacturer’s instructions closely, and never skip final safety inspections.
Can I reuse my old opener with a new door?
In many cases, existing openers can be reused, but compatibility depends on the new door’s weight, size, and hardware. Modern doors often require openers with specific power ratings or features. To explore the best options and ensure seamless integration, see this guide to smart garage door openers and home automation.
What is the average cost of a DIY garage door installation?
A typical installation for garage door project can range from $600 to $1,200 for materials, with openers and accessories adding $300 to $800. Doing the work yourself could save up to 40 percent compared to hiring a professional, but factor in the cost of any required tools.
| Item | Estimated Cost (AUD) |
|---|---|
| Door Kit | $600 – $1,200 |
| Opener | $300 – $800 |
| Tools/Accessories | $100 – $200 |
Are permits required for garage door replacement in Australia?
Most local councils do not require a permit for direct replacement of a garage door of the same size and type. However, if you are altering the structure or installing a larger door, check with your local council to confirm requirements before beginning installation for garage door upgrades.
How can I ensure my new door is cyclone/wind rated?
Look for wind rating labels and product certification that comply with Australian Standard AS/NZS 4505:2012. For homes in cyclone-prone areas, ensure your installation for garage door includes appropriate bracing and wind-rated components specified by the manufacturer.
What maintenance is required post-installation?
After installation for garage door projects, perform maintenance every six months. Lubricate moving parts, check and adjust weather seals, and clean tracks regularly. Inspect fasteners and test safety features to maintain smooth operation and prevent costly repairs.
Maintenance Checklist:
- Lubricate hinges, rollers, and tracks
- Inspect weather seals for wear
- Test auto-reverse and safety sensors
- Tighten all fasteners
Where can I find reliable installation guides and support?
Manufacturer resources, detailed PDF manuals, and online tutorial videos provide step-by-step help for installation for garage door. Customer service hotlines and email support are also available if you need expert advice during your project.
After following this step by step guide, you now have the confidence and know how to tackle your own garage door installation safely and effectively. If you’re ready to put your new skills to use and want a door that fits your space perfectly, you can explore a wide selection of high quality Australian made options tailored for DIY installation. With clear instructions, custom sizing, and expert support, you’re empowered to take control of your project from start to finish. Discover how easy it is to get started with DIY Garage Doors.